
The Homelab Bench is reader-supported. As an Amazon Associate we earn from qualifying purchases; this article contains affiliate links.
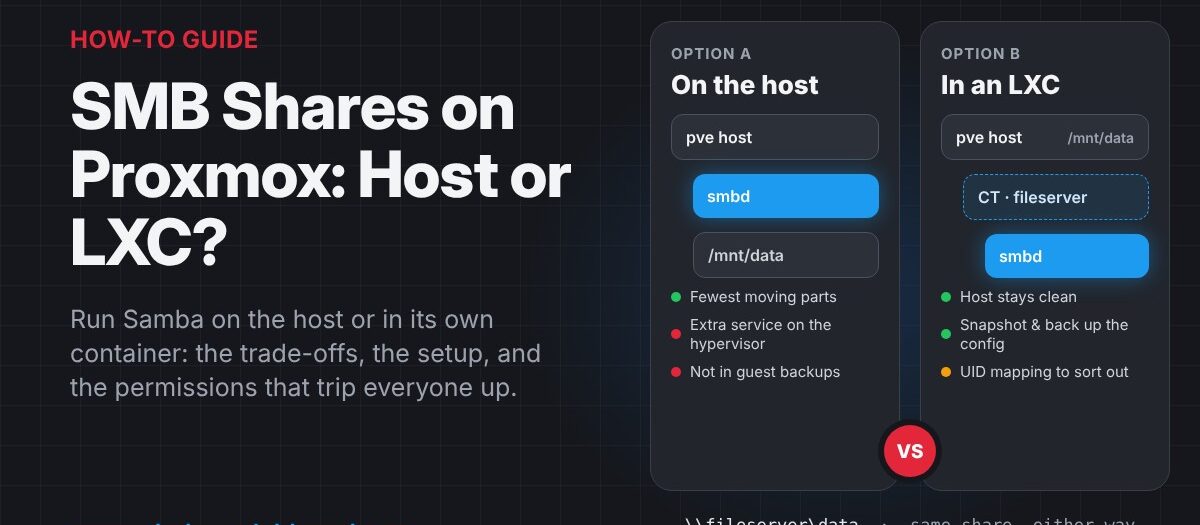
This guide shows two ways to serve an SMB share (a Windows-style network folder) from a Proxmox box: installing Samba directly on the Proxmox host, or running it inside a small LXC container that reaches the files through a bind mount. You will set up both, see where each one bites, and finish with a share that Windows, macOS and Linux can all use.
The commands are written for Proxmox VE 9 (based on Debian 13) and a Debian 13 container, and also work on Proxmox VE 8 and Debian 12 with the small differences noted along the way.
Host or LXC: Which Should You Pick?
For a share you plan to keep, run Samba in an LXC. Proxmox is a hypervisor, not a NAS, and the usual advice on the Proxmox forum is to keep the host as close to stock as possible. Every extra package on the host is something that can clash with a Proxmox upgrade, and a bug in a network-facing service like Samba lands on the one machine that runs everything else.
A container keeps Samba, its users and its config in a box you can snapshot, back up, restore or throw away. The files themselves still live on the host’s disk, so there is no performance penalty worth worrying about.
Samba on the host still has its place: a quick test share, a single-purpose box, or a setup where you want the share to stay up even when every guest is stopped. It is also fewer steps, so it is covered first.
| Samba on the host | Samba in an LXC | |
|---|---|---|
| Setup | Fewest steps | A few more (container, bind mount, ownership) |
| Isolation | None: Samba runs on the hypervisor | Samba is confined to an unprivileged container |
| Proxmox upgrades and reinstalls | Extra packages to carry along; config lost on reinstall unless you saved it | Host stays stock; restore the container and you are back |
| Backups of Samba config and users | Not covered by Proxmox backup jobs | Included when you back up the container |
| Backups of the shared files | Not included either way: bind-mounted data is skipped by Proxmox backups, so back it up separately | |
| Permissions | Plain Linux ownership | Needs the UID mapping fix explained below |
New to containers? Read Creating Your First VM and LXC Container in Proxmox first. This guide assumes you know your way around the web UI and the node Shell (click your node in the tree, then Shell).
Method 1: Samba Directly on the Proxmox Host
Every command in this section runs in the Proxmox host shell as root.
Step 1: Install Samba
apt update
apt install -y samba
Step 2: Create the folder and a share user
Pick where the files will live. /srv/samba/shared is used throughout this guide. If your data is on a separate disk or ZFS dataset, use its path instead (a dataset created with zfs create tank/shared is mounted at /tank/shared).
mkdir -p /srv/samba/shared
useradd -M -s /usr/sbin/nologin shareuser
smbpasswd -a shareuser
chown shareuser:shareuser /srv/samba/shared
chmod 2770 /srv/samba/shared
The useradd line makes a Linux account with no home folder and no login shell. Samba keeps its own password list, and smbpasswd -a adds the user to it and asks for the password you will type on your PCs. Never share as root.
Step 3: Define the share
Open /etc/samba/smb.conf with nano and add this at the bottom:
[shared]
   path = /srv/samba/shared
   read only = no
   valid users = shareuser
   guest ok = no
   create mask = 0660
   directory mask = 2770
Save with Ctrl+X, Y, Enter. Then check the file and restart Samba:
testparm -s
systemctl restart smbd
systemctl status smbd --no-pager
testparm reports any typo in smb.conf. You want active (running) from the last command.
Step 4: Firewall
The Proxmox firewall is off by default, so there is nothing to do on most installs. Check Datacenter > Firewall > Options. If it says Firewall: Yes with an Input Policy of DROP, like ours, add a rule under pve > Firewall that accepts TCP port 445 from your LAN.
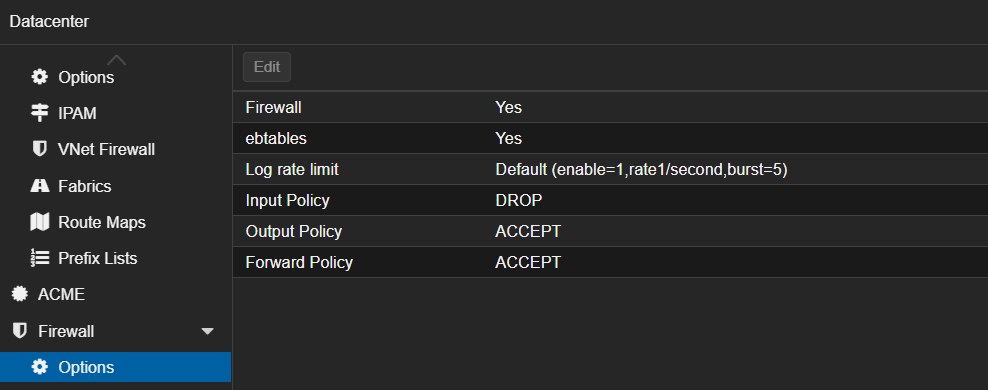
For Method 2, the same applies to the container: its firewall only filters traffic if you have enabled it under the container’s Firewall > Options. If you have, add the port 445 rule there instead.
Your share is now at \\your-proxmox-ip\shared. Skip to Connecting from Windows, macOS and Linux, or read on for the container method.
Method 2: Samba Inside an LXC Container
Here the files stay on the host, a small Debian container runs Samba, and a bind mount makes the host folder appear inside the container.
Step 1: Create a Debian container
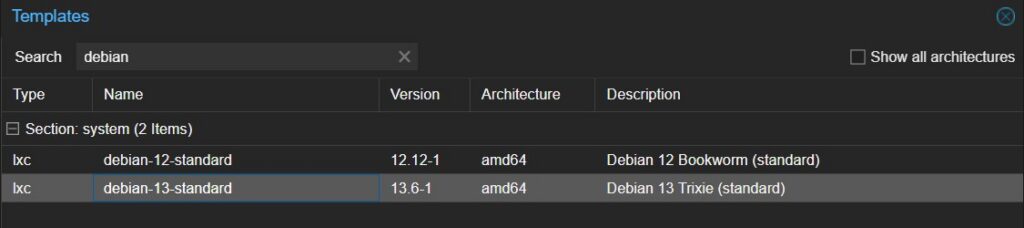
- Click your local storage in the tree, open CT Templates, click Templates, pick debian-13-standard (or debian-12 on Proxmox VE 8) and click Download.
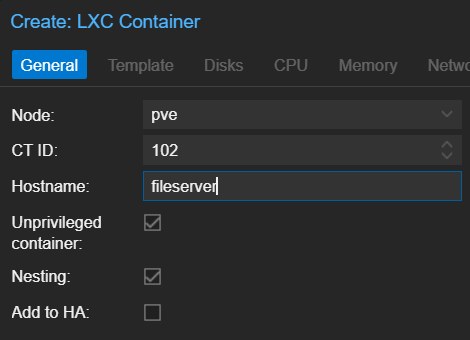
- Click Create CT (top right) and work through the wizard. Leave Unprivileged container ticked. Give it a hostname such as
fileserver, an 8 GB root disk (the shared files do not live here), 1 core and 512 MB of RAM. - On the Network tab, give it a static IP, or a DHCP reservation on your router, so the share address never changes.
- Note the container ID. This guide uses
101.
Step 2: Prepare the host folder
Back in the host shell:
mkdir -p /srv/samba/shared
chown 100000:100000 /srv/samba/shared
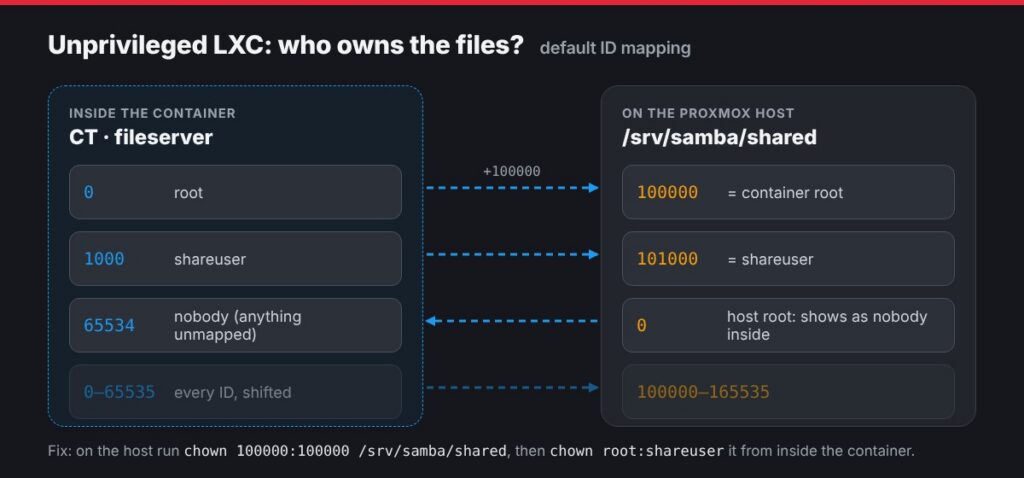
That chown is the step most guides skip, and the reason most people end up with “Permission denied”. An unprivileged container’s IDs are shifted by 100000 on the host: root inside the container is UID 100000 outside it, the first user you create (UID 1000) is 101000, and so on. A folder owned by the host’s real root shows up inside the container as nobody:nogroup, and nothing in there can change it. Handing it to 100000 gives it to the container’s root, which can then pass it on to your share user.
Step 3: Add the bind mount
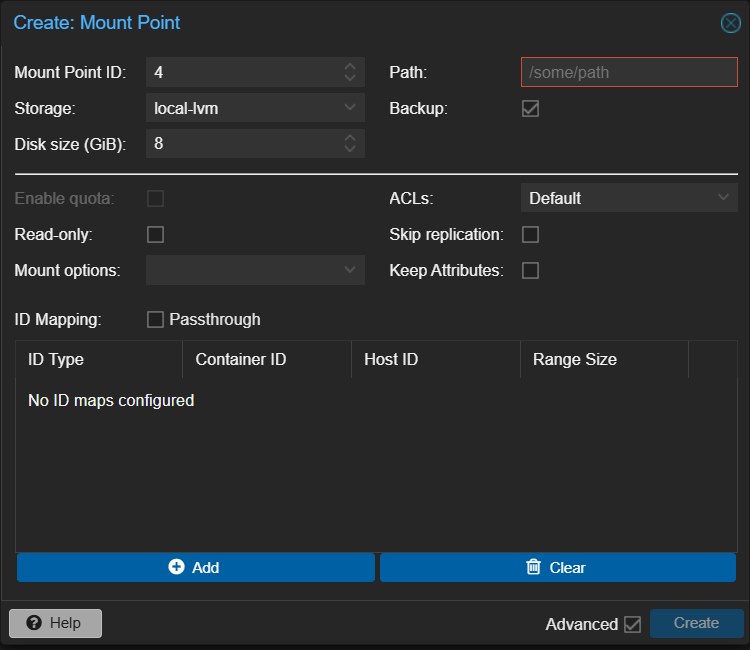
The web UI’s Add > Mount Point dialog only creates a new disk on a Proxmox storage (note the Storage and Disk size fields), so a bind mount to an existing host folder is added from the shell:
pct set 101 -mp0 /srv/samba/shared,mp=/srv/samba/shared
pct reboot 101
The first path is on the host and the one after mp= is where it appears inside the container. They don’t have to match, but it keeps things easy to follow. The line is saved in /etc/pve/lxc/101.conf, so it comes back after every reboot. Add ,ro=1 to the end if a container should only ever read the folder.
Once added, a bind mount shows up in the container’s Resources tab like any other mount point. Here are the four on one of our own containers, with the first one read-only:
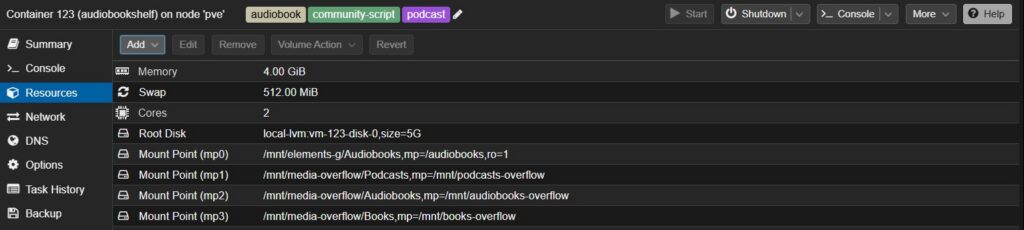
Proxmox only lets you set bind mounts as root@pam. Proxmox also warns against bind-mounting system folders such as /, /etc or /var into a container, so stick to a dedicated data folder.
Step 4: Install Samba in the container
Open the container’s Console (click the container, then Console) or run pct enter 101 from the host shell. Then:
apt update
apt install -y samba
useradd -M -s /usr/sbin/nologin shareuser
smbpasswd -a shareuser
chown root:shareuser /srv/samba/shared
chmod 2770 /srv/samba/shared
The 2 in 2770 sets the setgid bit, so new files and folders inherit the shareuser group.
Add the share to the bottom of /etc/samba/smb.conf:
[shared]
   path = /srv/samba/shared
   read only = no
   valid users = shareuser
   force group = shareuser
   guest ok = no
   create mask = 0660
   directory mask = 2770
Check and restart:
testparm -s
systemctl restart smbd
systemctl status smbd --no-pager
Samba starts automatically with the container. Set the container itself to Start at boot under Options so the share comes back after a host reboot. If you want a more fully-featured NAS OS to run as a VM instead, see our LGM-OS review.
Step 5 (optional): Make it show up in Windows’ Network view
Typing the address always works, but modern Windows no longer browses the old NetBIOS way, so the share won’t appear under Network in File Explorer by itself. Install the WS-Discovery daemon in the container (or on the host for Method 1) to fix that:
apt install -y wsdd-server   # Debian 13
apt install -y wsdd          # Debian 12
Connecting from Windows, macOS and Linux
Windows: In File Explorer, type \\fileserver-ip\shared in the address bar and sign in as shareuser. To keep it as a drive letter, right-click This PC, choose Map network drive, enter the same path and tick Reconnect at sign-in.
macOS: In Finder press Cmd+K, enter smb://fileserver-ip/shared, choose Registered User and sign in.
Linux: Install cifs-utils, create /root/.smbcreds containing username=shareuser and password=yourpassword, run chmod 600 /root/.smbcreds, then add this to /etc/fstab:
//fileserver-ip/shared /mnt/shared cifs credentials=/root/.smbcreds,_netdev,nofail 0 0Home Assistant OS: Go to Settings > System > Storage, click Add network storage, choose Samba/Windows (CIFS) and enter the server, share name and shareuser login. To mount the share in another container instead, see our guide to accessing a network drive from an LXC.
Keep the Files Backed Up
Proxmox backup jobs skip bind-mounted folders, so backing up the container saves Samba’s config and users but not the shared files. The same goes for Method 1. Give the folder its own backup: an rsync job to a USB backup drive or NAS, or ZFS replication if it lives on a dataset. Our guides to automated backups with Proxmox Backup Server and connecting a NAS to Proxmox cover the container side and the storage side.
A USB drive enclosure is the cheapest way to turn a spare drive into an offline backup target:
Check price: Amazon UK | Amazon US | Amazon IE
If the share sits on spinning disks that stay on around the clock, NAS-rated drives such as WD Red Plus are built for that duty and use CMR recording rather than the SMR found in many cheaper desktop drives:
Check price: Amazon UK | Amazon US | Amazon IE
Troubleshooting
“Permission denied” when writing from the container
Inside the container, run ls -ld /srv/samba/shared. If it shows nobody nogroup, the host-side chown 100000:100000 was missed. Run it on the host, then repeat the chown root:shareuser and chmod 2770 inside the container.
Windows says guest access is blocked, or “the cryptographic signature is invalid”
Windows 11 24H2 requires SMB signing by default and, on Pro editions, refuses password-less guest connections. A share with a real user like the one above works with both. If you see these errors, you are probably hitting an old guest share: set guest ok = no, connect with a username and password, and clear old sessions with net use * /delete in a Windows command prompt.
Windows keeps using the wrong login
Windows only allows one set of credentials per server. Remove the saved entry under Control Panel > Credential Manager > Windows Credentials, run net use * /delete, and connect again.
The container won’t start after adding the bind mount
The host path must exist before the container starts and must not contain a symlink. Check it with ls -ld on the host and fix the line with pct set 101 -mp0 ....
Samba won’t start
Run testparm -s. It points to the line in smb.conf that is wrong.
Frequently Asked Questions
Can I use a privileged container and skip the UID mapping?
Yes. In a privileged container, root inside is root on the host, so ordinary ownership just works. The cost is isolation: Proxmox and the LXC project only recommend privileged containers in trusted environments, because an escape from one lands you as root on the host. The one-line chown is a small price for keeping the container unprivileged.
Can several containers use the same folder?
Yes. Add the same host path as a bind mount to each container. Mark it ro=1 on any that only need to read, such as a media server, and remember they all see the same shifted IDs, so the 100000-based ownership works for every unprivileged container.
Do I need SMB1 for older devices?
Current Samba versions only accept SMB2 and newer by default, which every supported version of Windows, macOS and Linux speaks. Leave SMB1 off unless an old device such as a scanner truly needs it. If one does, add server min protocol = NT1 under [global] and limit it to that device with hosts allow.