
The Homelab Bench is reader-supported. As an Amazon Associate we earn from qualifying purchases; this article contains affiliate links.
This guide gets a Windows 10 or 11 drive mounted on Proxmox so your hypervisor can store ISO images, backups, and container templates on a drive that lives elsewhere on your network. You will share a folder on the Windows side, install the right tools on Proxmox, and make the mount survive a reboot — using either the Proxmox web UI or the command line.
What You Need Before You Start
- A Windows 10 or 11 PC with a folder (or whole drive) you want to share — the machine must stay powered on whenever Proxmox needs to reach it.
- A Proxmox VE host on the same local network (same subnet). If you are still shopping for hardware, check out our Best Mini PCs for Proxmox Homelabs guide.
- The Windows PC’s local IP address — open a Command Prompt and type
ipconfig; look for the IPv4 address, something like192.168.1.50. - A dedicated local Windows user account for Proxmox to authenticate with (you will create this below). Do not use your personal login.
- Access to the Proxmox web interface, usually at
https://<proxmox-ip>:8006.
Quick Orientation: The Proxmox Web UI Layout
If you are new to Proxmox, here is a 30-second map so the steps below make sense. When you log in at port 8006 you see a three-column layout:
- Left sidebar (the server tree): Shows your Datacenter at the top, your Proxmox node beneath it (named something like
pve), and then any VMs or containers nested under the node. Storage pools you add also appear here once created. - Centre panel: Changes depending on what you click in the sidebar. Click your node and you get node-level tabs like Summary, Shell, Storage, and so on.
- Task log (bottom panel): Recent tasks and their status appear here when something is running or when you apply a change.
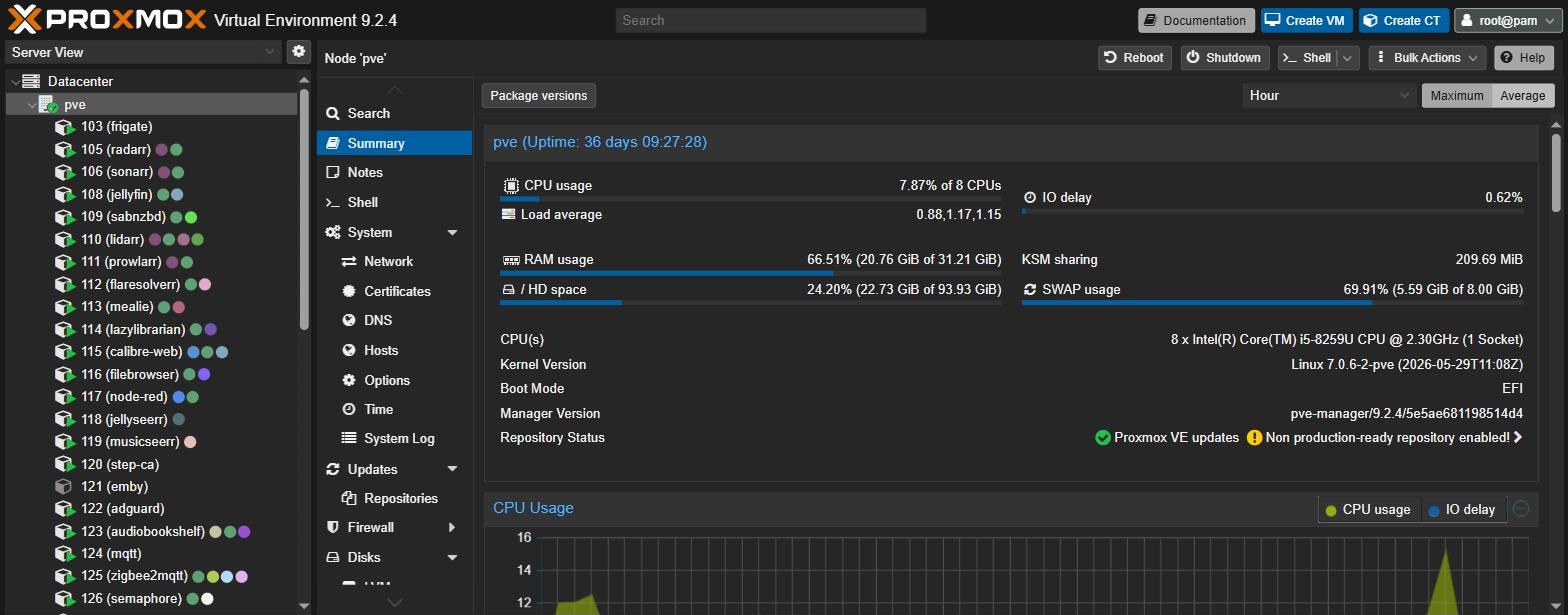
The steps that involve the Proxmox GUI will tell you exactly which item in the sidebar to click and which tab to use. If you have not yet spun up any VMs or containers, our guide on Creating Your First VM and LXC Container in Proxmox is a good companion read once this share is live.
Part 1: Set Up the Windows Side
Step 1 — Set Your Network Profile to Private
SMB sharing works reliably only on a Private network profile. On Windows 11, go to Settings → Network & Internet → (your adapter, e.g. Ethernet) → Properties and set the network type to Private. On Windows 10 the path is Settings → Network & Internet → (click your adapter) → Properties and toggle the radio button to Private. Windows blocks many sharing features on Public profiles, so this step is not optional.
Step 2 — Enable Network Discovery and File Sharing
Open Control Panel → Network and Sharing Center → Change advanced sharing settings. Under the Private section, turn on network discovery and file and printer sharing. Save your changes. Without these, Windows will not respond to SMB connections from Proxmox.
Step 3 — Create a Dedicated Local User Account
You need a local Windows account — not a Microsoft account — that Proxmox will use to authenticate. A purpose-built account with a stable password lets you revoke access later and keeps credentials minimal.
- Right-click This PC → Manage (or run
compmgmt.mscfrom the Run dialog). - In the left pane, expand Local Users and Groups → Users.
- Right-click in the blank area and choose New User.
- Give it a username like
proxmoxand a strong password. Untick User must change password at next logon, and tick Password never expires if this is a homelab where you control rotation manually. - Click Create, then Close.
Write down this username and password — you will need them on the Proxmox side in Part 2.
Step 4 — Share the Folder (or Drive)
- Navigate to the folder you want to share in File Explorer. To share a whole drive, go to This PC, right-click the drive, and choose Properties.
- Open the Sharing tab and click Advanced Sharing.
- Tick Share this folder. Give it a short share name with no spaces — for example
proxmox-data. Share names with spaces will not appear correctly in the Proxmox GUI share dropdown. - Click Permissions, remove Everyone if it is present, click Add, type the username you just created (
proxmox), and grant it Change (read/write) or Read depending on whether Proxmox needs to write backups or only read ISOs. - Click OK through all dialogs.
Also set NTFS permissions: Switch to the Security tab on the same Properties window, click Edit → Add, add your proxmox user, and grant Modify or Read & execute as appropriate. Share permissions and NTFS permissions both apply; the more restrictive of the two wins, so both must allow access.
Step 5 — Note the Windows Firewall
Windows Firewall automatically opens the required ports when you enable file and printer sharing, so you should not need manual rules. If you have a third-party firewall or antivirus with its own network control, make sure TCP port 445 is permitted inbound from your LAN subnet on the private zone.
Step 6 — Find the Share Path and Test It
Your share is reachable at \\<Windows-PC-IP>\proxmox-data. Test it from another Windows machine: press Win + R, type that path, and authenticate with your proxmox credentials. Confirming it works from Windows first eliminates a whole category of debugging on the Proxmox side.
Part 2: Connect the Share to Proxmox
There are two approaches: the GUI method (easier, good for backups and ISO storage) and the command-line method via /etc/fstab (more flexible, required when you want to bind-mount the share into an LXC container). Both are covered below.
Step 7 — Install CIFS Utilities on the Proxmox Host
CIFS (Common Internet File System) is the Linux name for the SMB protocol. Proxmox is Debian-based, so open the Proxmox shell — click your node name in the left sidebar, then the Shell tab — and run:
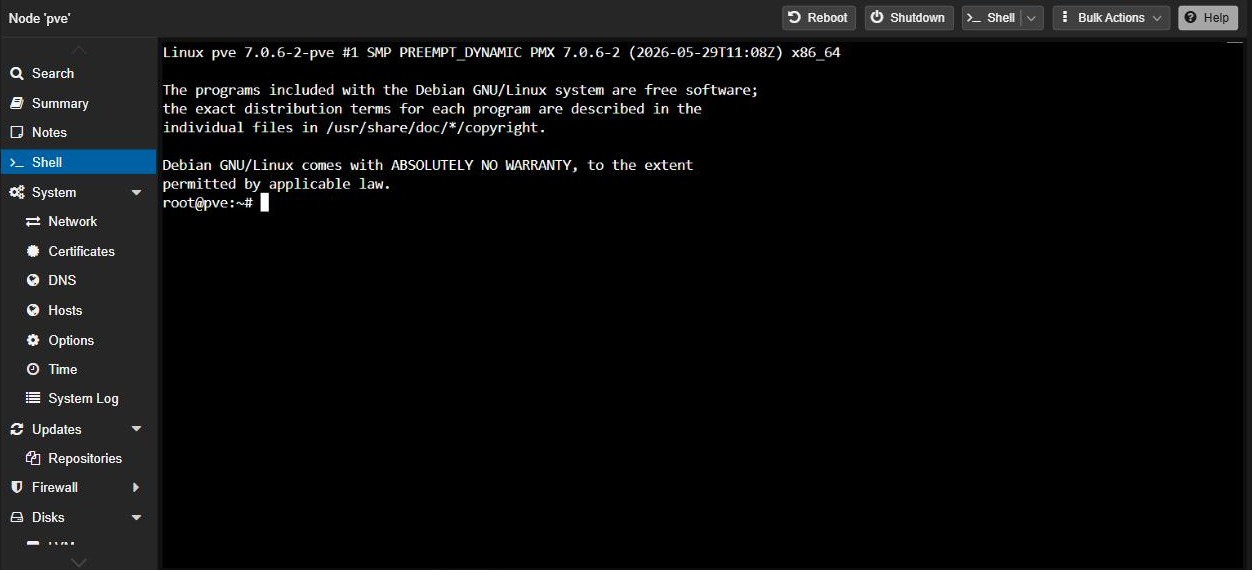
apt update && apt install cifs-utils -yThis installs mount.cifs, which both the GUI and the fstab method rely on. Without it, any attempt to mount an SMB share will fail with a cryptic error before it even tries to reach the Windows machine.
Step 8 (GUI Method) — Add the Share as Proxmox Storage
This is the fastest path and works well for ISOs, backups, and container templates.
- Click Datacenter at the top of the left sidebar (not your node — the Datacenter entry above it).
- In the centre panel, click the Storage tab.
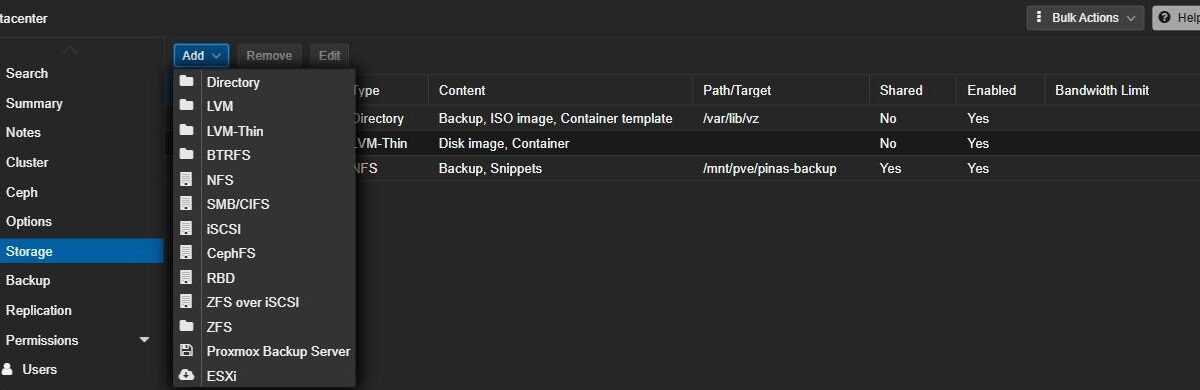
- Click Add and select SMB/CIFS from the dropdown.
- Fill in the dialog:
- ID: A name Proxmox uses internally, e.g.
win-share. No spaces. - Server: The IP address of your Windows machine, e.g.
192.168.1.50. - Username: The dedicated account you created, e.g.
proxmox. - Password: The password for that account.
- Share: Click the dropdown — Proxmox will query the Windows machine and list available shares. Pick
proxmox-data. - Content: Choose what Proxmox is allowed to store here. Common choices are ISO image, VZDump backup file, and Container template. You can multi-select.
- ID: A name Proxmox uses internally, e.g.
- Click Add. The share will appear in the left sidebar under your node.

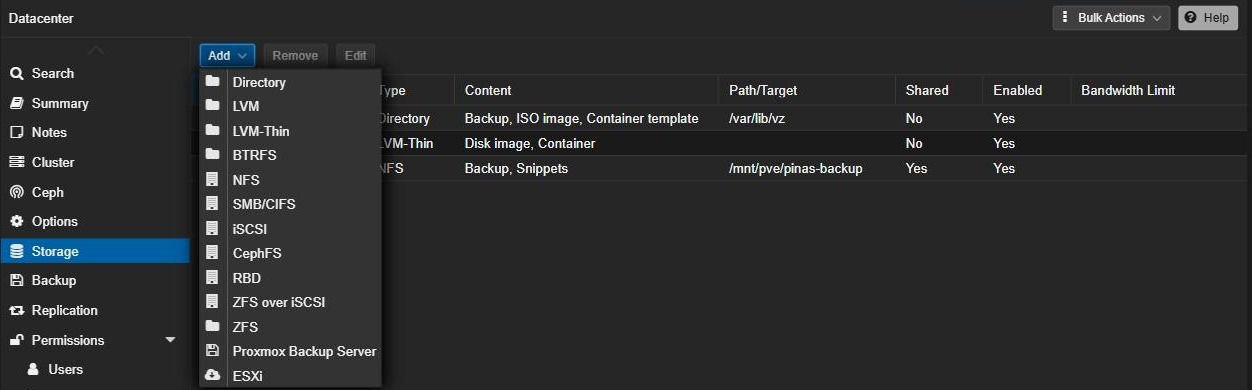
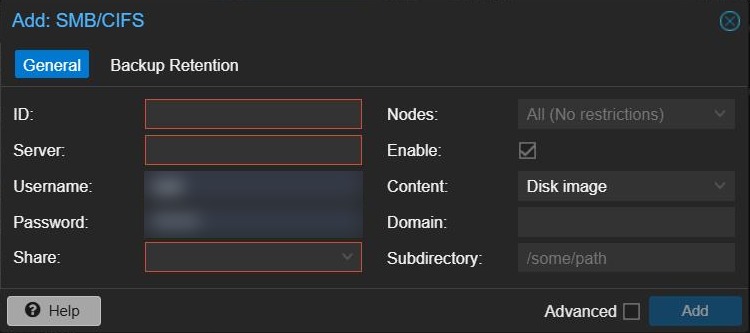
Once added, the share is mounted at /mnt/pve/<your-ID> on the Proxmox host. Proxmox manages the mount automatically across reboots.
Step 9 (CLI Method) — Mount via fstab for LXC Passthrough
If you want to pass the share directly into an LXC container as a bind mount — for example so a Home Assistant LXC can read media files — you need to mount the share on the host manually and then bind it into the container. Our separate guide on Accessing a network drive from an LXC (read and write) covers the container side; these steps handle the host mount.
Create a credentials file so your password is never in plain text inside /etc/fstab:
mkdir -p /etc/samba
nano /etc/samba/.smbcreds
Inside that file, add exactly two lines:
username=proxmox
password=YourPasswordHere
Save and close (Ctrl+O, Enter, Ctrl+X), then lock down the file so only root can read it:
chmod 600 /etc/samba/.smbcredsCreate the mount point directory:
mkdir -p /mnt/win-shareTest the mount manually first:
mount -t cifs -o credentials=/etc/samba/.smbcreds,vers=3.0 //192.168.1.50/proxmox-data /mnt/win-shareIf ls /mnt/win-share shows your files, the credentials and share name are correct. Run umount /mnt/win-share before the next step.
Add an fstab entry for automatic mounting:
nano /etc/fstabAdd this line at the bottom (replace the IP and share name with yours):
//192.168.1.50/proxmox-data /mnt/win-share cifs credentials=/etc/samba/.smbcreds,vers=3.0,_netdev,x-systemd.automount,x-systemd.requires=network-online.target,nofail 0 0A breakdown of the important options:
- vers=3.0 — Forces SMB version 3, which modern Windows uses by default and is significantly more secure than SMBv1.
- _netdev — Tells systemd this mount requires the network, delaying the attempt until after networking is available.
- x-systemd.automount and x-systemd.requires=network-online.target — Makes systemd wait for the network-online target before mounting. Plain
_netdevalone often fails on cold boot on Proxmox; this combination is more reliable. - nofail — Prevents Proxmox from hanging at boot if the Windows machine is off. Essential in any homelab where devices are not all powered on at the same time.
Save the file, then apply it:
systemctl daemon-reload
mount -a
Confirm that /mnt/win-share shows your files, then reboot and verify it mounts again automatically.
Part 3: Verification and Troubleshooting
Step 10 — Verify the Mount is Working
After mounting, run:
df -h | grep win-shareYou should see your Windows drive listed with its size and used space. Write a test file to confirm write access:
touch /mnt/win-share/proxmox-test.txtCheck that the file appears on the Windows side in File Explorer. If it does, Windows drive sharing to Proxmox is fully operational.
Common Problems and Fixes
| Symptom | Likely Cause | Fix |
|---|---|---|
| mount error(13): Permission denied | Wrong credentials or NTFS permissions not set for the user | Double-check the username/password in .smbcreds; verify the proxmox user has Modify rights in the Security tab |
| mount error(115): Operation now in progress | Firewall blocking port 445 or wrong IP address | Ping the Windows machine from the Proxmox shell; check Windows Firewall is permitting SMB on the private zone |
| Share name not appearing in Proxmox GUI dropdown | Share name contains spaces, or cifs-utils not installed | Rename the share without spaces; confirm apt install cifs-utils completed without error |
| Mounts fine manually but not on reboot | Network not ready when fstab runs | Add x-systemd.automount,x-systemd.requires=network-online.target to the fstab options |
| Read-only, cannot write files | Share permissions set to Read only | In Windows, go back to Advanced Sharing → Permissions and grant the proxmox user Change rights |
What to Use This Share For
- ISO storage: Drop OS installer images on the Windows machine and point Proxmox’s ISO path at the share. No more uploading ISOs twice.
- VM backups: Point Proxmox’s scheduled backup job at the SMB storage to keep full backups off the Proxmox host’s local disk.
- LXC media access: Bind-mount the share into a Jellyfin or Plex LXC so it can stream files stored on the Windows drive without copying them. See our guide on Accessing a network drive from an LXC (read and write) for the container configuration.
Hardware Worth Mentioning
If your Windows machine uses a USB-attached hard drive and it goes to sleep or disconnects mid-backup, a purpose-built enclosure with always-on power management solves it. A 2-bay or 4-bay USB enclosure with UASP support gives stable, fast transfers without the drive spinning down unexpectedly.
Check price: Amazon UK | Amazon US | Amazon IE
If you want to add a large spinning drive to the Windows machine acting as your file server, a mid-range 4TB or 8TB desktop hard drive is a practical option for bulk ISO and backup storage without spending on NAS-grade hardware.
Check price: Amazon UK | Amazon US | Amazon IE
FAQ
Can I use my main Windows login instead of creating a separate user?
You can, but it is not recommended. Microsoft accounts in particular behave unpredictably with SMB authentication, and if you ever change that password your Proxmox mount breaks silently. A dedicated local account with a stable password is the reliable choice.
Does the Windows machine need to stay on for Proxmox to work?
Yes, whenever Proxmox needs to access that storage. If the Windows machine is off and Proxmox tries to write a backup or read an ISO, the operation fails. This is why the nofail option matters in your fstab entry — without it, Proxmox itself can stall at boot waiting for a share that is not there. If you need always-on storage, a NAS or a small dedicated Linux machine is a better long-term choice than a Windows desktop.
Will this work with Windows 11 Home, or do I need Pro?
Windows 11 Home supports SMB file sharing — the steps in this guide apply to Home, Pro, and Pro for Workstations alike. Home lacks the Local Group Policy Editor (gpedit.msc), but you do not need it for anything described here. The Local Users and Groups tool (compmgmt.msc) is available on all Windows 11 editions.
2 comments on "Set up a Windows drive for sharing to Proxmox"
Pingback: How to Back Up and Restore Home Assistant (2026 Guide) - The Homelab Bench
Pingback: Proxmox LXC Network Share: Mount SMB or NFS Read-Write