
The Homelab Bench is reader-supported. As an Amazon Associate we earn from qualifying purchases; this article contains affiliate links.
LXC Network Drive Access for Read and Write: A Complete Beginner’s Guide
By the end of this guide you will have a network share — SMB/CIFS from a NAS or Windows machine, or NFS from a Linux box — mounted inside a Proxmox LXC container with full read and write access. You will understand exactly why the standard “just mount it inside the container” approach breaks, and you will have a setup that survives reboots and is clean enough to reuse across multiple containers without repeating yourself. If your share lives on a Windows PC, our Windows drive sharing guide covers setting up that side first.
If you are newer to Proxmox and have not yet set up your first LXC container, start with our guide on Creating Your First VM and LXC Container in Proxmox before coming back here. And if you are still choosing hardware for your homelab server, our Best Mini PCs for Proxmox Homelabs roundup is a good starting point.
What You Need Before You Start
- A Proxmox VE host (any reasonably recent version)
- At least one LXC container already created and running
- A network share already configured on your NAS or file server — SMB/CIFS (Samba) or NFS
- Root (or sudo) shell access to the Proxmox host, not just the container
- The IP address or hostname of your NAS/file server, and the share path
Orienting Yourself: Where Things Live in Proxmox
If you are new to Proxmox, a quick map of the interface will save you a lot of confusion later.
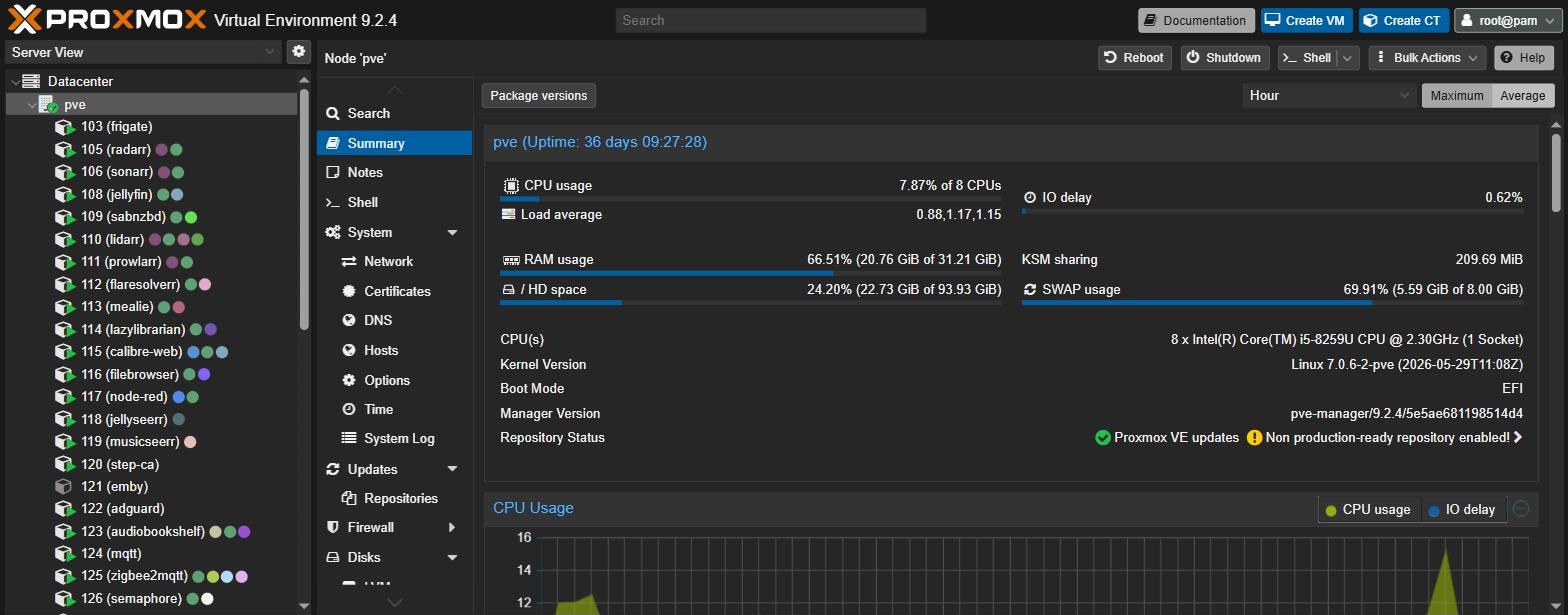
- Datacenter panel (left sidebar, top): cluster-wide settings, storage pools, users.
- Node (your server name, below Datacenter): expand this to see all VMs and containers on that machine.
- Container entry (e.g. “100 (mycontainer)”): click it to see its tabs down the left of the main panel — Summary, Console, Resources, Network, DNS, Options, Backup, Snapshots and more.
- Shell at the node level: click your node name in the left sidebar, then click Shell in the top menu. This gives you a root terminal on the Proxmox host itself — not inside any container. Almost everything in this guide runs here.
- Container console: click the container entry, then click Console. This drops you into the container’s own terminal. You use this only for the verification steps at the end.
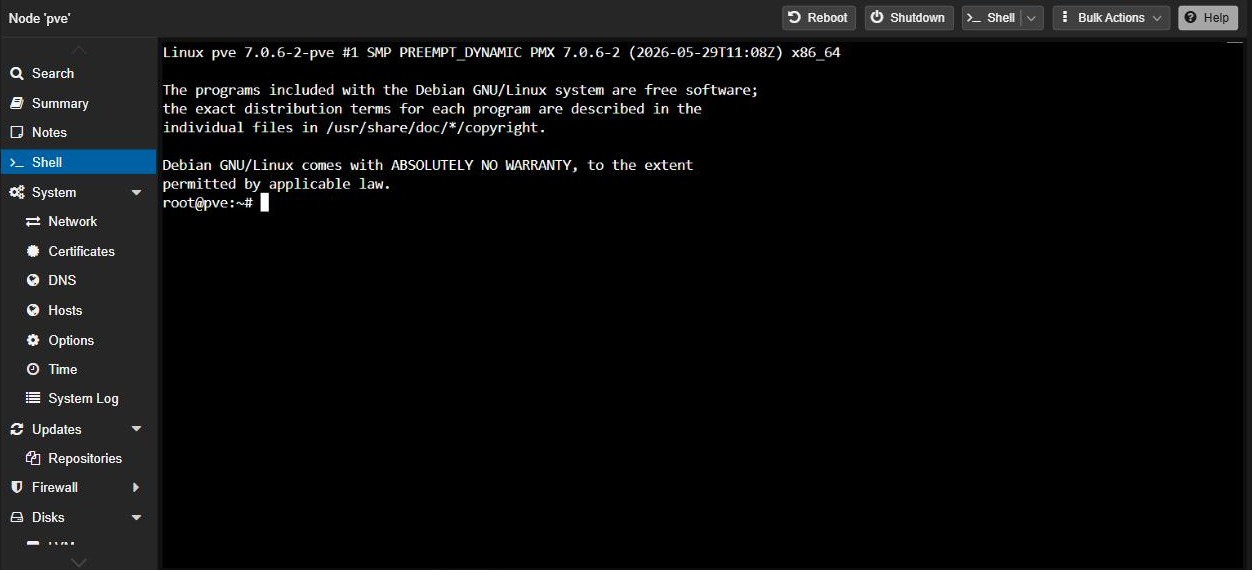
Most of this guide is done in the Proxmox host shell, not in the container. That distinction matters a lot.
Why You Cannot Just Mount Inside the Container
This is the question every newcomer hits. The short answer: Proxmox creates unprivileged LXC containers by default, and in unprivileged containers all user IDs and group IDs are mapped to a different number range — for example, the root UID which is normally 0 becomes 100000 on the host. Running an application that needs access to shared network storage like NFS or CIFS/Samba is not directly supported in unprivileged containers.
Bind mounts are the preferred and recommended method; using privileged containers is discouraged for security reasons. The approach that works cleanly is a two-step process: first you mount the remote folder on the Proxmox host itself, and then you use Proxmox’s bind mount feature to make that already-mounted directory visible inside the container.
Mounting on the host first gives you one place to manage permissions and makes troubleshooting far easier — if five containers all mount the same share independently, you get to debug five different permission problems.
The Big Picture: UID/GID Offset Explained Simply
Before you touch a command, understand this one concept or you will spend hours confused by permission errors.
In an unprivileged LXC, all UIDs and GIDs from 0 to 65535 inside the container are actually UIDs and GIDs from 100000 to 165535 on the host — everything is shifted by 100000. So if a share is owned by UID 1000 on the host, the user with UID 1000 in the LXC cannot access it, because that user is actually using UID 101000 on the host and does not own that share.
In practice this means: when you mount the share on the Proxmox host, you must tell the mount command to present the files as being owned by UID/GID 101000 (for a normal user with UID 1000 inside the container) so that the container user sees them as its own files. The step-by-step below builds this in automatically.
Step-by-Step: Mounting an SMB/CIFS Share (Recommended for Most Home Labs)
SMB is what Windows shares and most NAS devices (Synology, QNAP, TrueNAS) use by default. These steps run on your Proxmox host shell unless stated otherwise. If you only need the share as Proxmox storage for backups and ISOs, rather than inside a container, our guide to sharing a NAS drive with Proxmox covers that simpler route.
Step 1: Install the CIFS Utilities on the Proxmox Host
Open the Proxmox host shell (click your node → Shell in the top bar) and run:
apt update
apt install -y cifs-utils
This installs the tools the host needs to speak the SMB protocol. Without it, the mount -t cifs command later will fail with a “type not found” error.
Step 2: Create a Mount Point Directory on the Host
Pick a logical location under /mnt. Name it something you will recognise:
mkdir -p /mnt/nas/mediaYou can create as many of these as you have shares. Each share gets its own subdirectory.
Step 3: Store Your NAS Credentials Securely
Never put a plain-text password in /etc/fstab. Instead, create a credentials file:
nano /etc/samba/credentials-nasInside the file, type exactly:
username=YOUR_NAS_USERNAME
password=YOUR_NAS_PASSWORD
Save and close (Ctrl+X, then Y, then Enter). Then lock it down so only root can read it:
chmod 600 /etc/samba/credentials-nasStep 4: Test the Mount Manually First
If ownership looks wrong on the host, fix it before touching the LXC — this single check catches most issues before they spread into the container. Test with a one-off mount command before editing fstab:
mount -t cifs //192.168.1.10/media /mnt/nas/media \
  -o credentials=/etc/samba/credentials-nas,uid=101000,gid=101000,file_mode=0775,dir_mode=0775,vers=3.0
Replace 192.168.1.10 with your NAS IP and /media with your actual share name. The uid=101000,gid=101000 values match the default unprivileged container mapping for a user with UID 1000 inside the container. Confirm the share is visible:
ls /mnt/nas/mediaIf you see your files, the credentials and network path are correct. Unmount the test:
umount /mnt/nas/mediaStep 5: Make It Permanent with fstab
Manual mount commands do not survive a reboot — you need /etc/fstab entries on the Proxmox host. Open fstab:
nano /etc/fstabAdd a line like this at the bottom (keep it on one line in the actual file):
//192.168.1.10/media /mnt/nas/media cifs credentials=/etc/samba/credentials-nas,uid=101000,gid=101000,file_mode=0775,dir_mode=0775,vers=3.0,_netdev,x-systemd.automount,noatime 0 0The key options explained:
uid=101000,gid=101000— presents files to the host as belonging to host UID/GID 101000, which maps back to UID/GID 1000 inside the container._netdev— tells systemd to wait for the network before attempting the mount, preventing boot failures if your NAS is not yet reachable.x-systemd.automount— delays the actual mount until the path is first accessed, which avoids timing problems at boot.noatime— access timestamps are not updated when a file or folder is read, which reduces unnecessary write traffic to the NAS.
Mount all fstab entries to confirm no typos:
mount -aThen verify:
ls /mnt/nas/mediaStep 6: Add the Bind Mount to Your LXC Container
You need your container’s numeric ID. Find it in the left sidebar of the Proxmox web UI — it is the number next to the container name (e.g. 100). Now run this on the host shell:
pct set 100 -mp0 /mnt/nas/media,mp=/mnt/mediaBreaking this down:
pct set 100— targets container 100. Replace with your container ID.-mp0— this is mount point slot zero. If you add a second share later, use-mp1, and so on./mnt/nas/media— the path on the Proxmox host where the share is mounted.mp=/mnt/media— the path inside the container where it will appear. The directory inside the container will be created automatically if it does not exist.
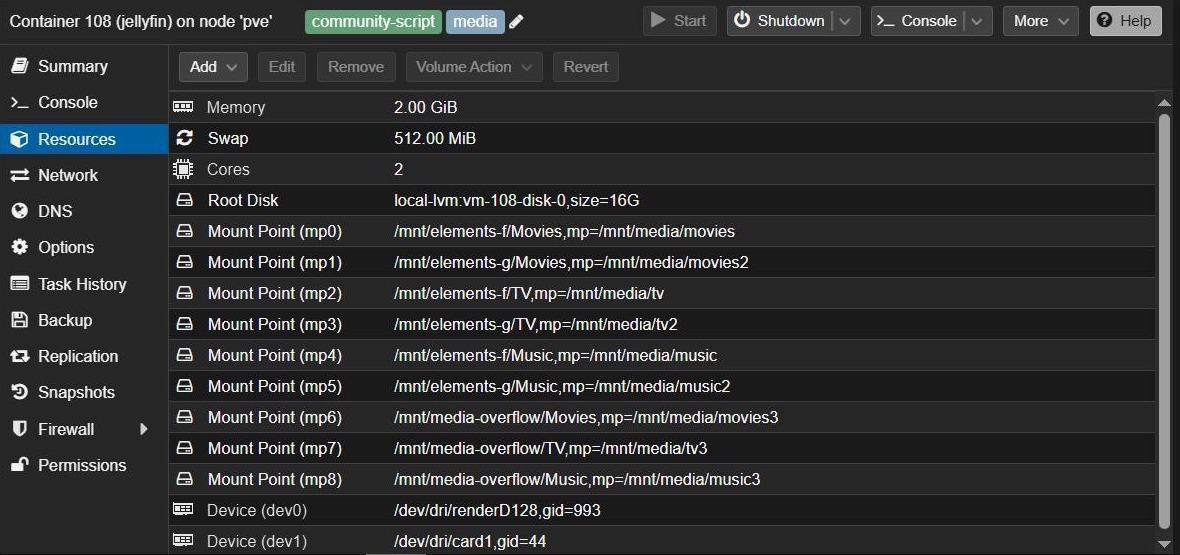
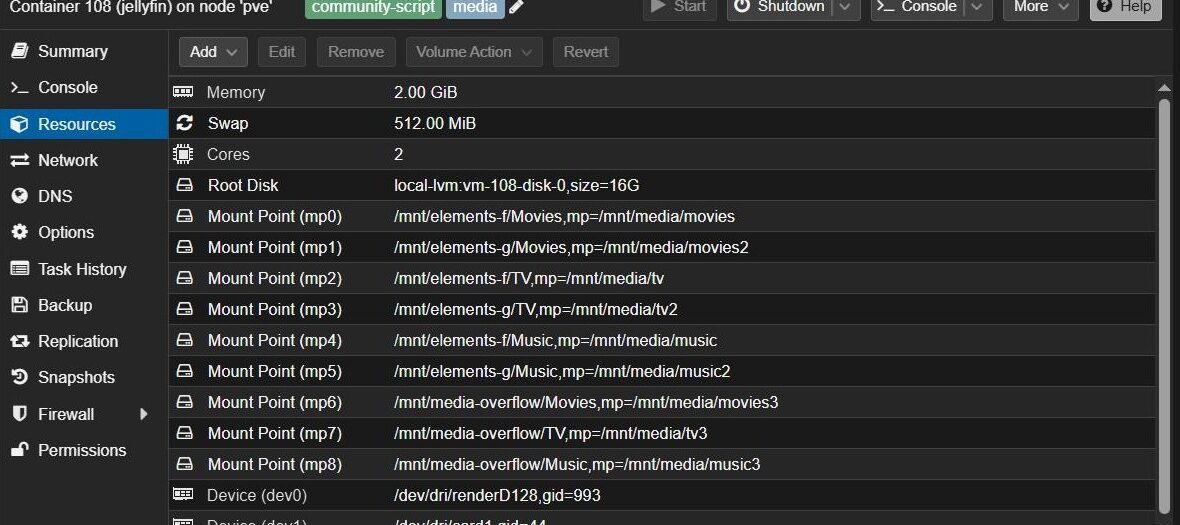
Be aware that bind-mounted storage will not be included in backups made by Proxmox — back up the data at the NAS level instead. Also note that you cannot take snapshots of LXC containers that have bind mounts attached. If snapshots matter to you, see the FAQ at the bottom of this article.
Step 7: Restart the Container and Verify
Restart the container so the new mount point takes effect. If the container is running, you can reboot it directly:
pct reboot 100If the container is already stopped, start it instead:
pct start 100Then open the container’s console (click the container in the left sidebar → Console) and check:
ls -la /mnt/mediaYou should see your NAS files listed. To confirm write access works:
touch /mnt/media/test-write.txt
rm /mnt/media/test-write.txt
If both commands succeed without a “permission denied” error, you have full read and write access. You are done.
NFS Alternative: Same Pattern, Different Install
NFS is common on Linux-based NAS devices and TrueNAS. The overall approach is identical — mount on the host, bind-mount into the container — but the install step and fstab line differ slightly.
Install NFS Support on the Proxmox Host
apt update
apt install -y nfs-common
Add the NFS Share to fstab
192.168.1.10:/volume1/media /mnt/nas/media nfs rw,uid=101000,gid=101000,noatime,_netdev,nofail,rsize=1048576,wsize=1048576 0 0One important NFS-specific detail: if you previously allowlisted your container’s IP address on the NAS export, change it to the Proxmox host’s IP address instead. The host is now the one connecting to the shared folder, not the container.
NFS permissions are tied directly to numeric UID and GID values, so make sure the IDs exported by the NAS line up with what the mapped LXC user needs. If you see ownership issues, check that your NFS export on the NAS is set to no_root_squash, or that the anonuid/anongid on the export matches the host-side UID (101000 by default).
The bind mount command for the container is exactly the same as in Step 6 above — NFS vs SMB makes no difference once the share is mounted on the host.
Sharing the Same Network Drive Across Multiple Containers
One of the best things about this approach is that you can mount the share once on the Proxmox host and then bind-mount the result into as many LXCs as you need. That gives you one place for NAS credentials and mount behaviour, while each container just sees a normal Linux directory.
For a second container with ID 200 that also needs the same share:
pct set 200 -mp0 /mnt/nas/media,mp=/mnt/mediaNo changes needed to fstab. No second mount. Both containers read and write to the same host-mounted path.
Troubleshooting Common Issues
| Symptom | Likely Cause | Fix |
|---|---|---|
| “Permission denied” when writing inside container | UID mismatch — host mount not owned by 101000 | Re-mount with uid=101000,gid=101000 in fstab options |
| Share disappears after reboot | Missing _netdev or no fstab entry |
Add _netdev to fstab options; confirm fstab entry exists |
| Mount point empty inside container | Container restarted before host mounted the share | Run mount -a on host, then pct reboot <ID> |
| NFS: host connects but shows wrong file owner | NAS is squashing root; UID mismatch | Set no_root_squash on the NAS export or adjust anonuid |
| Snapshot button greyed out in Proxmox UI | Bind mounts block Proxmox snapshots by design | See FAQ below for the workaround |
Hardware That Makes This Easier
Running Proxmox on capable hardware makes a real difference when you have multiple LXC containers each pulling data from a network share simultaneously. A mini PC with a fast NIC and enough RAM to keep your containers comfortable is a good starting point — our Best Mini PCs for Proxmox Homelabs guide covers the options in detail.
If your NAS is a dedicated device, you will also want a decent network switch to avoid bottlenecks between it and your Proxmox host. An unmanaged gigabit switch is the minimum; a managed switch lets you put the NAS traffic on a separate VLAN for added control.
Unmanaged Gigabit Switch:
Check price on Amazon
Managed Gigabit Switch:
Check price on Amazon
If you are also running a Zigbee or Z-Wave coordinator inside an LXC container for Home Assistant, our Best Zigbee Hub for Home Assistant guide is worth a look — the USB passthrough approach for those devices follows a similar logic to what you have learned here.
FAQ
Does adding a bind mount to an LXC container break snapshots?
Yes — you cannot take snapshots of LXC containers with bind mounts attached. A workaround is to add the mount using a raw LXC directive in the container’s config file instead of through the pct set command. Add this line to /etc/pve/lxc/<ID>.conf:
lxc.mount.entry: /directory/on/host directory/in/container none bind,rw 0 0Note that the container-side path has no leading slash — this is correct LXC syntax, not a typo. Using this directive instead of the standard mpX config key makes Proxmox unaware of the bind mount, which restores the snapshot option. The trade-off is that the mount is invisible in the Proxmox UI’s Resources tab.
Can I mount the network share directly inside the LXC instead of on the host?
No — you are not allowed to mount NFS or SMB shares directly inside an unprivileged LXC. You must mount those shares on the Proxmox host and then bind-mount the mount points from the host into the unprivileged LXC. The only way to avoid this two-step approach is to run a privileged container, which is discouraged for security reasons.
Will this setup survive a Proxmox host reboot automatically?
Yes, as long as your fstab entry on the host includes _netdev and the bind mount is registered via pct set. The _netdev flag ensures the share is not attempted before the network is up. If you use x-systemd.automount, the share will not actually mount until it is first accessed — the LXC bind mount will trigger this access automatically, but there can be timing issues during boot on slow NAS devices. Adding a short startup delay to the container (Options → Start/Shutdown Order → Startup Delay in the Proxmox UI) is a reliable way to prevent those edge cases.
2 comments on "Accessing a network drive from an LXC (read and write)"
Pingback: Proxmox Windows Share: Connect an SMB Folder (2026 Guide)
Pingback: Picking the best UPS for your homelab - The Homelab Bench