
The Homelab Bench is reader-supported. As an Amazon Associate we earn from qualifying purchases; this article contains affiliate links.
By the end of this guide you will have a fully local Zigbee network running inside Home Assistant, with every paired device appearing automatically as entities you can use in automations and dashboards — no cloud, no vendor hub, no manual YAML entity declarations. We cover every step from choosing a coordinator to pairing your first device, and flag the places where recent Home Assistant and Zigbee2MQTT releases have changed how things look.
What Is Zigbee2MQTT and Why Use It Instead of ZHA?
Home Assistant ships with its own built-in Zigbee integration called ZHA (Zigbee Home Automation). ZHA is fine and genuinely easy to get started with. Zigbee2MQTT (usually shortened to Z2M) is a separate, community-maintained app that connects your Zigbee coordinator to an MQTT broker, which Home Assistant then subscribes to. That extra hop sounds like complexity for no reason — but it buys you real things:
- Device support. Zigbee2MQTT supports over 5,600 individual device models from nearly 600 vendors, including many obscure sensors and switches that ZHA doesn’t handle as completely.
- Separation of concerns. Z2M runs as its own process. If Home Assistant restarts or crashes, your Zigbee network stays up and keeps reporting to the broker.
- A dedicated web dashboard. Z2M ships with its own frontend for pairing, renaming, mapping mesh topology and running OTA firmware updates — all without leaving a browser tab.
- Granular configuration. Channel selection, transmit power, network key management, and per-device reporting intervals are all configurable from the Z2M frontend.
If you want the simplest possible path and you’re only running common IKEA or Aqara devices, ZHA will work. If you want maximum device support, the best mesh visualisation, and plan to grow beyond a handful of devices, Z2M is the better long-term choice. This guide sets up Z2M.
What You Need Before You Start
- A running Home Assistant OS installation. Apps aren’t available on Home Assistant Container installs, and the Supervised install method has been deprecated.
- A supported Zigbee USB coordinator (see Step 1 below).
- A short USB 2.0 extension cable — roughly 1 to 2 metres — to move the coordinator away from your server’s USB ports.
- At least one Zigbee device to test pairing with.
If you’re running Home Assistant inside Proxmox (a very common setup for anyone stepping up from a Raspberry Pi), check our guide on Creating Your First VM and LXC Container in Proxmox to make sure your USB device is correctly passed through to the VM before you continue.
A Quick Orientation: Key Home Assistant Menus You’ll Use
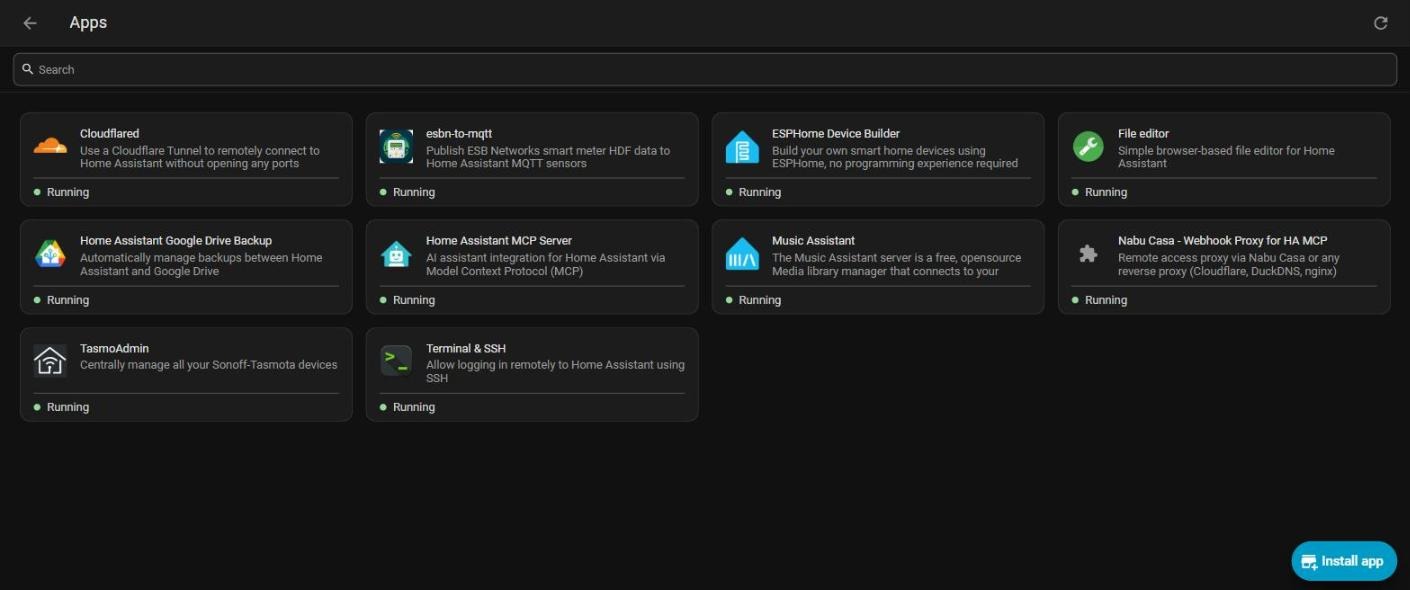
Apps (formerly called add-ons). Since Home Assistant 2026.2, what used to be called add-ons are called apps, and the Add-on Store is now the App Store. Nothing works differently — only the names changed — but older guides and forum posts still use the old terms, so you’ll see both.
Here’s a map of the interface areas this guide references so you’re not hunting for them mid-step:
- Settings → Apps: This is where you install and manage apps like Mosquitto and Zigbee2MQTT. The Install app button (bottom-right) opens the App store, where you browse and install new ones.
- Settings → Devices & Services: Where the MQTT integration lives after you set it up. This is also where discovered Zigbee devices appear once pairing is done.
- Settings → System → Hardware: Lets you inspect what serial/USB devices are attached to your host.
- App page tabs: Every installed app has an Info tab (start/stop/restart), a Configuration tab (edit settings), and a Log tab (troubleshoot). You’ll use all three.
Step 1: Choose and Plug In Your Zigbee Coordinator
The coordinator is the USB stick (or network-attached device) that forms the heart of your Zigbee network. Not every stick works equally well with Zigbee2MQTT — you want something with an actively maintained chipset and a strong community track record. For a deeper look at the options, see our Best Zigbee Hub for Home Assistant roundup, or if you’re deciding between a USB dongle and a network-attached device, our Zigbee Hub vs Dongle guide walks through the tradeoffs.
Two coordinators stand out for Z2M beginners:
Option A: SONOFF Zigbee 3.0 USB Dongle Plus (ZBDongle-P)
Built on the Texas Instruments CC2652P chipset, the ZBDongle-P remains one of the most widely recommended coordinators in the Zigbee2MQTT community. It ships pre-flashed with Z-Stack coordinator firmware, so no flashing is required out of the box, and in Zigbee2MQTT it uses the zstack adapter type. The CC2652P has a built-in power amplifier capable of up to +20 dBm, but Zigbee2MQTT defaults to 5 dBm — to use the extra range, set transmit_power: 20 under advanced (covered in Step 8). It is widely used, well-documented, and community troubleshooting resources are everywhere.
Check price: Amazon UK | Amazon US | Amazon IE
Option B: SONOFF ZBDongle-E (EFR32MG21)
The ZBDongle-E uses Silicon Labs’ EFR32MG21 chip running EmberZNet firmware — the same chip Nabu Casa used in its original Home Assistant SkyConnect (later Connect ZBT-1). In Zigbee2MQTT it uses the ember adapter type. It arrives pre-flashed, but some units ship with older firmware than the current ember driver needs: check the ZBDongle-E entry on the Zigbee2MQTT adapters page for the minimum version, and update with SONOFF’s web flasher if yours is behind. Its aluminium housing provides additional shielding against electromagnetic interference. Both dongles are fully supported by Zigbee2MQTT, so either will work for this guide — choose whichever is easiest for you to get hold of.
Check price: Amazon UK | Amazon US | Amazon IE
The USB Extension Cable — Non-Negotiable
Do not plug the coordinator directly into the back of your server or Raspberry Pi. USB 3.0 ports and devices generate electromagnetic noise in the 2.4 GHz band, which is exactly the frequency Zigbee uses. A short USB 2.0 extension cable of one to two metres, placing the coordinator’s antenna in open space, is usually enough to solve the problem. Use a USB 2.0 cable: the point is to get the stick away from USB 3 ports and their interference, and a USB 2.0 cable doesn’t carry the noisy USB 3 signal lines.
Check price: Amazon UK | Amazon US | Amazon IE
Plug the coordinator (via its extension cable) into a USB port on your Home Assistant host now, before you touch any software.
Step 2: Find the Coordinator’s Serial Port Path
Zigbee2MQTT can often detect your coordinator automatically during setup (Step 5), but it’s worth knowing the exact path in case it can’t. The most reliable option is the persistent by-id path, which stays the same even if you unplug and replug the stick.
- In Home Assistant, go to Settings → System → Hardware.
- Open the System hardware tab at the top of the page.
- Type
ttyinto the search box to filter the list. Your coordinator shows up as attyUSBorttyACMdevice, usually with the manufacturer name (e.g. ITead, Silicon Labs, or Texas Instruments) in its ID. - Note the path in the ID column. It will look something like:
/dev/serial/by-id/usb-ITead_Sonoff_Zigbee_3.0_USB_Dongle_Plus_XXXXXXXX-if00
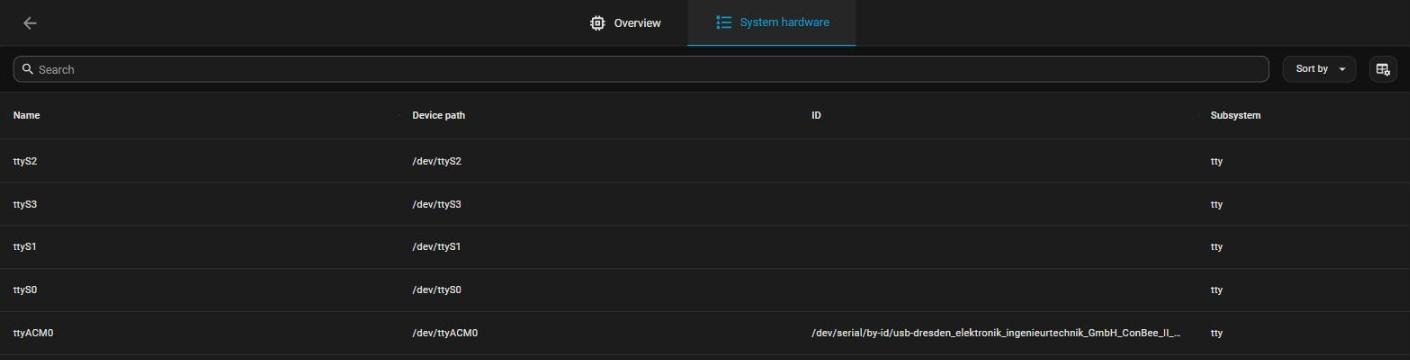
/dev/serial/by-id/... path; this example is a ConBee II, so yours will show your own coordinator.Copy that full path somewhere handy. The by-id path is preferred over a raw path like /dev/ttyUSB0 because ttyUSB0 can change if you connect or remove other USB devices, whereas the by-id path is derived from the device’s serial number and always points to the right stick.
Step 3: Install the Mosquitto MQTT Broker
Zigbee2MQTT does not talk directly to Home Assistant — it publishes messages over MQTT, and Home Assistant subscribes to them. That means you need an MQTT broker acting as the message bus between the two. Mosquitto is the standard choice and runs as an official Home Assistant app.
- Go to Settings → Apps.
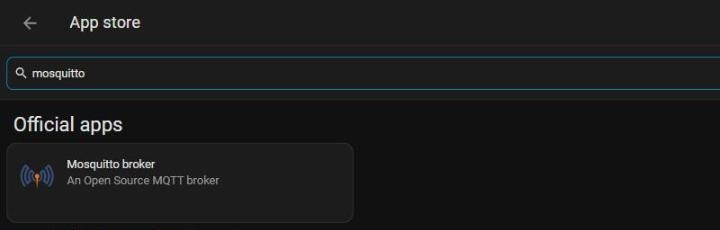
- Click Install app in the bottom-right corner to open the App store.
- Use the search box to find Mosquitto broker. It should appear near the top — it’s an official app maintained by the Home Assistant project.
- Click it and hit Install. Wait for installation to complete.
- Once installed, you’ll land on the app’s Info tab. Toggle on Start on boot and Watchdog (so it restarts automatically if it ever crashes), then click Start.
- Click the Log tab and confirm there are no errors. You should see lines indicating Mosquitto has started and is listening.
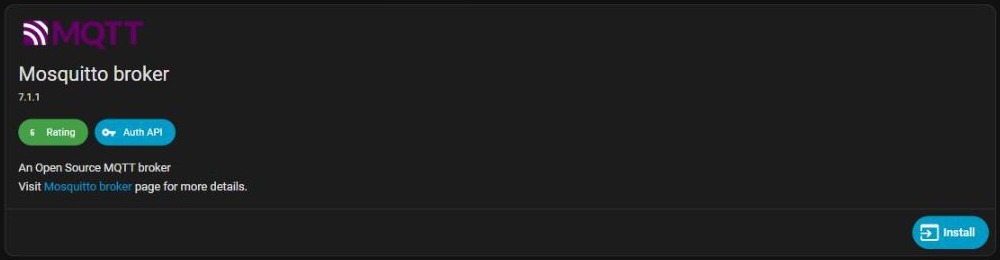
Now navigate to Settings → Devices & Services. Home Assistant should automatically detect the running Mosquitto broker and offer to configure the MQTT integration. Click Configure and accept the defaults. If it doesn’t appear, click the blue + Add Integration button, search for MQTT, and add it manually. This MQTT integration is what carries device data from Z2M into Home Assistant’s entity registry.
Step 4: Add the Zigbee2MQTT Repository to the App Store
Zigbee2MQTT is not in the default Home Assistant App Store — you need to register its repository first. This is a one-time step.
- Go back to Settings → Apps → App Store.
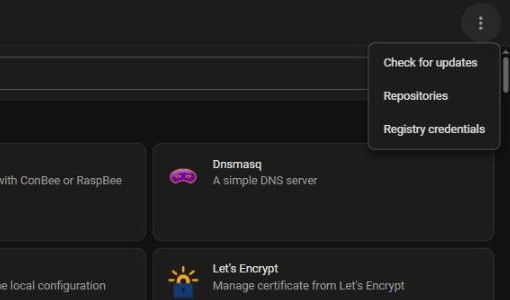
- Click the three-dot menu (⋮) in the top-right corner of the App Store page.
- Choose Repositories.
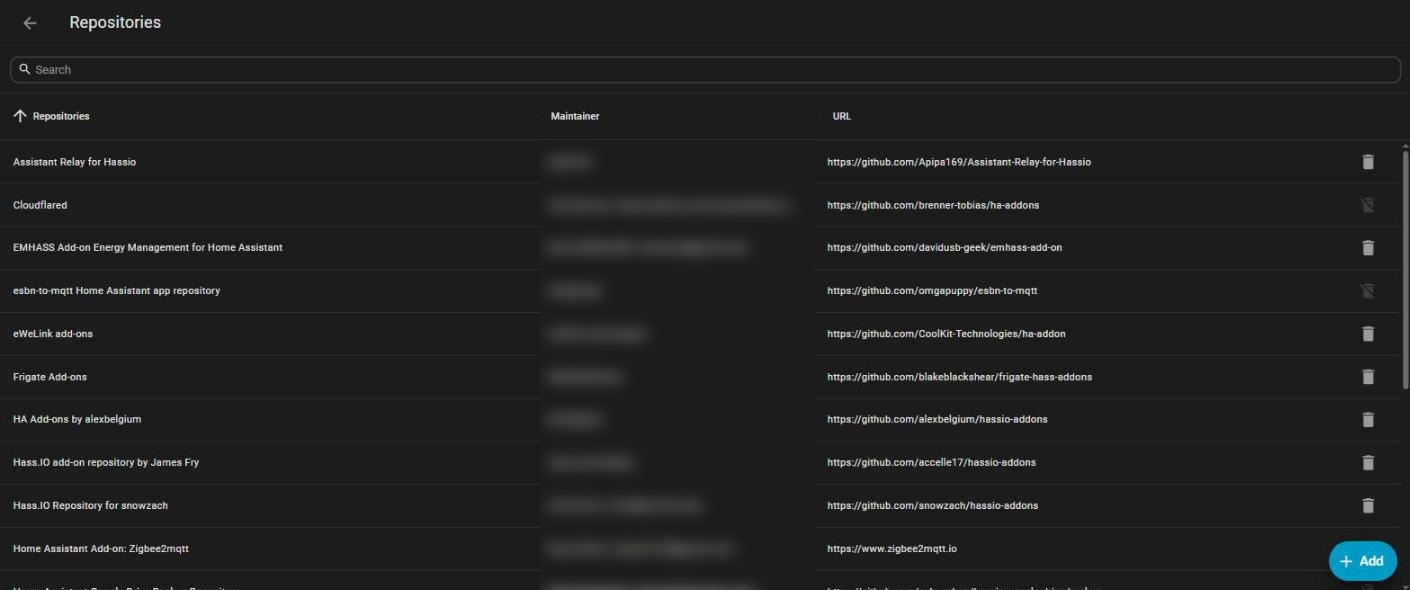
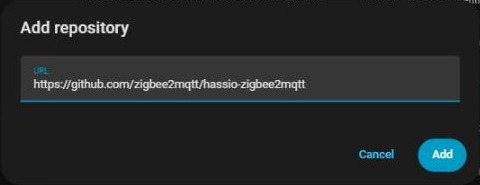
- On the Repositories page, click + Add (bottom-right) and paste this URL into the URL field:
https://github.com/zigbee2mqtt/hassio-zigbee2mqtt - Click Add, then use the back arrow to return to the App store.
- Refresh the App Store page (either by reloading the browser tab or navigating away and back). You should now see a new section in the store called Zigbee2MQTT, with two entries: Zigbee2MQTT (stable) and Zigbee2MQTT Edge (dev branch).

Install Zigbee2MQTT (the stable release). The edge version follows the development branch and may include fixes for brand-new devices, but for a first setup the stable release is the right call.
Step 5: Start Zigbee2MQTT and Complete Onboarding
Older guides tell you to paste a large YAML block into the Configuration tab before starting Zigbee2MQTT. Current versions don’t work that way. On a brand-new install, Z2M starts in onboarding mode and shows a quick setup page in its web UI where you pick your adapter and confirm the essentials. Only the startup settings live in the app’s Configuration tab; everything else is managed from the Z2M frontend.
- Open the newly installed Zigbee2MQTT app and go to its Info tab.
- Toggle on Start on boot, Watchdog and Show in sidebar.
- Click Start, then click Open Web UI (or use the new Zigbee2MQTT entry in the sidebar).
- The onboarding page lists any adapters Z2M detected. Select your coordinator. If it isn’t listed, enter the by-id path from Step 2 as the port and choose the adapter type yourself:
zstackfor the ZBDongle-P,emberfor the ZBDongle-E. Refreshing the page re-runs detection. - Check the MQTT details. When you’re using the Mosquitto app they’re normally pre-filled; if not, the server is
mqtt://core-mosquitto:1883. - If the page shows network settings (channel, PAN ID, network key), set the Zigbee channel now using the advice in Step 8 — this is the easiest moment to do it, before any devices have joined. Leave the PAN IDs and network key at their generated values.
- Submit the page. Z2M saves its
configuration.yamland restarts into normal mode.
If you’d rather configure it by hand, the app’s Configuration tab accepts the startup sections directly:
serial:
  port: /dev/serial/by-id/usb-ITead_Sonoff_Zigbee_3.0_USB_Dongle_Plus_XXXXXXXX-if00
  adapter: zstack   # use "ember" for the ZBDongle-E
mqtt:
  server: mqtt://core-mosquitto:1883
Settings entered on that Configuration tab override the same settings in configuration.yaml, so pick one place to manage them. A few things worth knowing:
- Home Assistant integration. MQTT discovery — the feature that makes paired devices show up as Home Assistant entities — is controlled by
homeassistant: enabled: trueand is on by default in the app. You can confirm it in the Z2M frontend under Settings → Home Assistant integration. - Pairing is off by default. There is no longer a
permit_joinsetting in the config. You open the network from the frontend when you want to pair (Step 6), for a maximum of 254 seconds at a time. - Network key. On first start, Z2M generates a unique encryption key for your Zigbee network and stores it in its data folder. Don’t lose it — see Step 9.
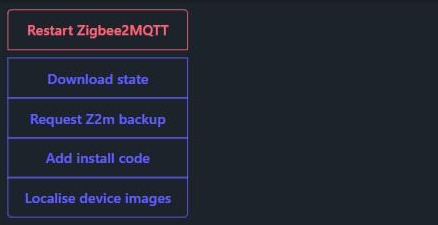
To confirm everything is running, open the app’s Log tab. You should see lines including something like Zigbee2MQTT started! and the coordinator’s firmware version. If you see a USB adapter discovery error or an invalid port, double-check the serial path and adapter type and make sure the USB stick is physically connected (and, on Proxmox, passed through to the VM).
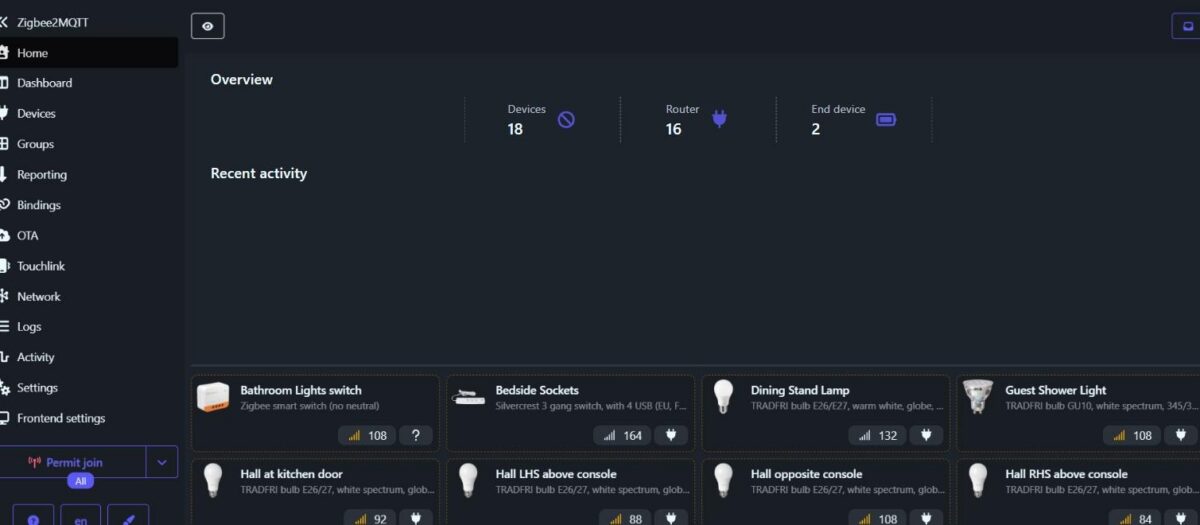
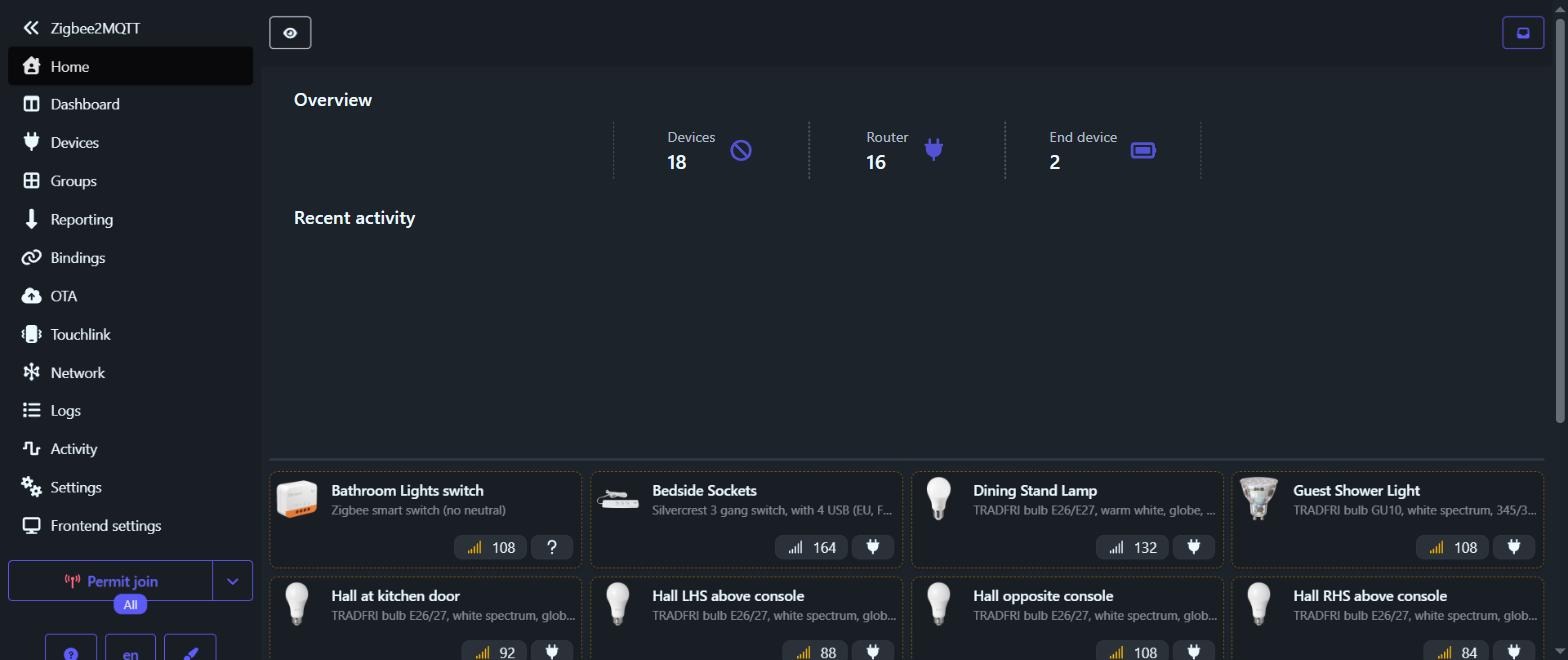
The Z2M web UI is a standalone dashboard, separate from the main Home Assistant UI. This is where you’ll manage your Zigbee network: pair devices, rename them, view the mesh map, and trigger OTA updates.
Step 6: Pair Your First Zigbee Device
Now the fun part. The process is the same for almost every Zigbee device regardless of brand: open the network to new joins, put the device into pairing mode, wait for it to appear. Planning to add a smart lock? Our best Zigbee smart locks for Home Assistant guide compares the main options.
- In the Zigbee2MQTT web frontend, click the Permit join button at the bottom of the left-hand menu. The network is now open to new devices for up to 254 seconds, and a countdown timer appears.
- Put your Zigbee device into pairing mode. The exact method varies by device — most sensors and plugs require holding a reset or pair button for five to ten seconds until an LED blinks rapidly. Check your device’s manual if you’re unsure; the Zigbee2MQTT supported devices page also lists pairing instructions for specific models.
- If you can, keep the device within one to two metres of the coordinator during this initial pairing. It can be placed further away once paired, as other mains-powered Zigbee devices (plugs, bulbs) will act as routers and extend the mesh.
- Watch the Z2M web UI — the device should appear in the Devices list within thirty seconds, initially with a raw IEEE address as its name (something like
0x00158d0001dc126a). - Click on the device entry and rename it to something meaningful — for example
living_room_plugorfront_door_sensor. Use lowercase with underscores; this string becomes the entity ID in Home Assistant. - Click Permit join again to close the network once you’re done, rather than waiting for the timer. An open network lets any nearby Zigbee device attempt to join.
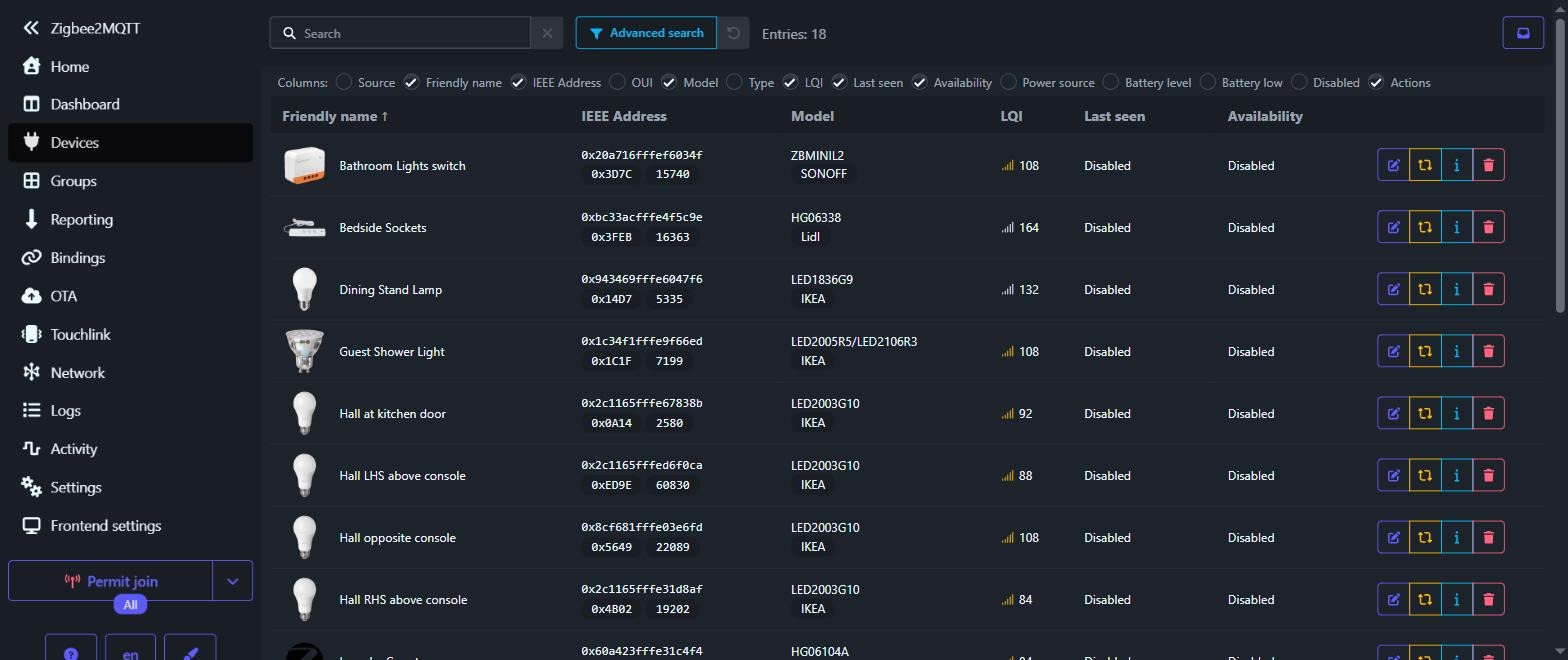
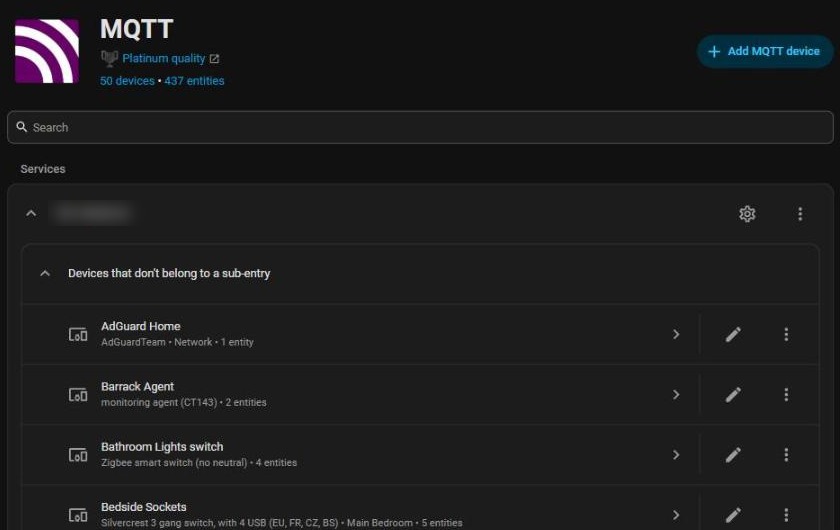
Now go to Settings → Devices & Services → MQTT in Home Assistant. Your newly paired device should have appeared there automatically, with all its entities (sensors, switches, energy readings, whatever the device exposes) ready to use. No manual configuration required — MQTT discovery handles it.
If you’re looking for devices to start with, mains-powered Zigbee smart plugs are an excellent first choice because they also act as Zigbee routers, strengthening your mesh from day one. See our Best Zigbee Smart Plugs with Energy Monitoring roundup for specific recommendations. If smart bulbs are your priority, our best smart bulbs for Home Assistant guide covers the top options tested with local control setups.
Step 7: Keep Z2M Updated
New Zigbee devices are added to Z2M’s supported device list regularly. Running an outdated version means a device that pairs fine may show as “unsupported” with no entities, simply because your running version predates that device’s support entry. In Home Assistant, go to Settings → Apps → Zigbee2MQTT and check the Info tab for available updates whenever you’re about to pair a new device type. Updating the app is a one-click process and does not require re-pairing your existing devices.
Step 8: Check Your Zigbee Channel and Transmit Power
Zigbee and Wi-Fi both operate on the 2.4 GHz band, which means they can interfere with each other if they overlap. Wi-Fi channels 1, 6, and 11 are the most commonly used, and each one overlaps a block of Zigbee channels:
| Wi-Fi channel | Overlaps Zigbee channels |
|---|---|
| 1 | 11–14 |
| 6 | 16–19 |
| 11 | 21–24 |
That leaves Zigbee channels 15, 20 and 25 sitting in the gaps between the standard Wi-Fi channels, which is why they’re the usual recommendation. (Channel 26 is also clear, but some devices transmit at reduced power on it or don’t support it at all.) Check which Wi-Fi channel your router actually uses and pick the Zigbee channel furthest from it.
To check or change your Z2M settings after onboarding:
- In the Z2M web frontend, go to Settings, open the Settings tab and then Advanced (the equivalent YAML is
advanced: channel:inconfiguration.yaml). - Find the Zigbee channel setting. The default is channel 11, which sits right on top of Wi-Fi channel 1.
- Change it to 15, 20, or 25. Changing the channel on an established network forces it to re-form, so expect to re-pair devices. Do this before you’ve paired dozens of devices, not after.
- If you’re using a ZBDongle-P, set Transmit power (
advanced: transmit_power:) to20to use its built-in amplifier. The default is 5 dBm.
Step 9: Back Up Your Zigbee Network
Your Zigbee network’s identity — the network key, PAN IDs, and a coordinator backup file (coordinator_backup.json) — lives in Z2M’s data folder, which you can see from the File editor app at /homeassistant/zigbee2mqtt. If you lose it, for example after a failed SD card or a botched migration, you’ll have to re-pair every device from scratch. Home Assistant’s built-in backups include this folder, so make sure automatic backups are switched on and that at least one copy is stored off the Home Assistant host. The same files are also what let you move to a new coordinator later without re-pairing everything.

Troubleshooting Quick Reference
| Problem | Most likely cause | Fix |
|---|---|---|
| Z2M won’t start — serial port or adapter error | Wrong port path or adapter type, or USB device not passed through to the VM | Re-check the path in Settings → System → Hardware and the adapter type (zstack or ember); confirm USB passthrough in Proxmox |
| Device pairs in Z2M but doesn’t appear in Home Assistant | Home Assistant integration disabled in Z2M, or MQTT integration not configured | Enable it under Settings → Home Assistant integration in the Z2M frontend (homeassistant: enabled: true), restart Z2M; confirm the MQTT integration exists under Settings → Devices & Services |
| Device appears as “Unsupported” | Running an old version of Z2M that predates the device | Update the Z2M app, then reconfigure or re-interview the device from its page in the Z2M frontend; re-pair only if that doesn’t work |
| Devices drop off the network intermittently | USB 3.0 interference, or Zigbee channel clashing with Wi-Fi | Use a USB 2.0 extension cable; switch Zigbee to channel 15, 20, or 25 |
| Device paired but shows wrong controls or missing sensors | Device needs an external converter | Find the external converter file on zigbee2mqtt.io or GitHub, place it in the external_converters folder inside the Z2M data folder (/homeassistant/zigbee2mqtt/external_converters/), then restart Z2M |
What to Explore Next
Once your Zigbee2MQTT network is stable and you have a handful of devices paired, a few natural next steps open up. If you’re interested in adding Thread and Matter devices alongside your Zigbee mesh, our Best Thread Border Router for Home Assistant guide explains what extra hardware you’d need, and the Thread Border Router vs Zigbee comparison helps you think through whether it’s worth the move. If your Home Assistant instance is outgrowing a Raspberry Pi and you’re thinking about running it on proper homelabbing hardware, our Best Mini PCs for Proxmox Homelabs guide is a good starting point.
FAQ
Can I run Zigbee2MQTT and ZHA at the same time?
No — not on the same coordinator. One application controls the radio at a time. If you previously set up ZHA and want to switch to Z2M, remove the ZHA integration from Settings → Devices & Services first, and then restart Home Assistant before setting up Z2M. Your devices will need to be re-paired from scratch, since ZHA and Z2M use incompatible network states.
Do I need to stay on the same Zigbee channel forever?
Not forever, but changing the channel after you’ve paired many devices is painful because the network has to re-form and devices may need re-pairing. Set your channel during onboarding — or at least before you’ve paired more than a couple of test devices — and you won’t have to revisit it. Channels 15, 20, and 25 are the safe choices that avoid overlap with the standard 2.4 GHz Wi-Fi channels 1, 6, and 11.
My device paired successfully but some entities are missing in Home Assistant — why?
The most common cause is that the Home Assistant integration is switched off in Z2M (homeassistant: enabled is not true), so MQTT discovery never published the device to Home Assistant. Check it under Settings → Home Assistant integration in the Z2M frontend and restart the Z2M app. If discovery is already on and entities are still absent, verify that the MQTT integration is active under Settings → Devices & Services and that the broker shows as connected in Z2M’s web UI. A device that pairs but shows up as “unsupported” in Z2M simply needs a Z2M update before its full entity set can be exposed.
One comment on "How to Set Up Zigbee2MQTT in Home Assistant (2026 Guide)"
Pingback: How to Back Up and Restore Home Assistant (2026 Guide) - The Homelab Bench