
The Homelab Bench is reader-supported. As an Amazon Associate we earn from qualifying purchases; this article contains affiliate links.
By the end of this guide you will have a fully working Home Assistant OS (HAOS) virtual machine running inside Proxmox VE, complete with Supervisor, add-on support, and USB dongle passthrough for Zigbee or Z-Wave. You will also understand how to take snapshots before updates so a bad release can never brick your smart home. No prior Proxmox or Linux experience required.
Why run Home Assistant inside a Proxmox VM?
If you are already running Proxmox — or shopping for a mini PC to run it on — putting Home Assistant OS inside a VM is the most capable setup you can build. You get the full Supervisor stack, including the add-on store, one-click restores, and automatic OS updates, while Proxmox layers snapshots and backups on top. A bad Home Assistant update can be rolled back in seconds without reflashing anything. You can also run other services — a VPN, a media server, a DNS sinkhole — on the same hardware without any of them interfering with Home Assistant.
If you are still choosing hardware for your Proxmox host, see our Best Mini PCs for Proxmox Homelabs roundup. Once Proxmox is installed and you can log into the web UI, come back here.
A quick tour of the Proxmox web interface
If this is your first time in Proxmox, spend two minutes here before following the steps — knowing the layout will stop you getting lost.
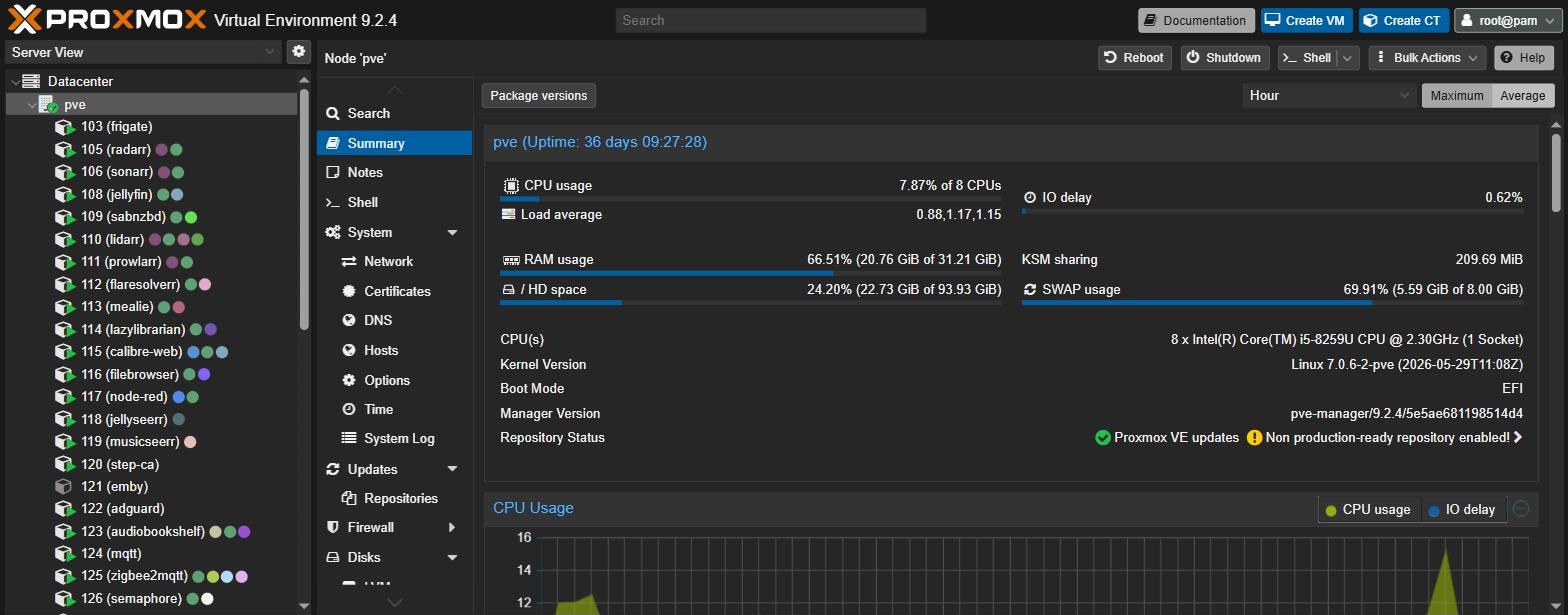
You reach the Proxmox web interface by pointing a browser at https://<your-proxmox-ip>:8006. It is served directly by the host, so there is no separate app to install. The page has three main regions:
- Left sidebar — the resource tree. This is a collapsible tree showing your entire setup. At the top you see Datacenter, which is the parent container for everything. Expand it and you see your node — the physical machine running Proxmox. Expand the node and you will see any VMs and containers you have created, listed by their numeric ID and name. For a single homelab box you will almost always be working one level below Datacenter, at the node level.
- Centre/right panel — the content area. Clicking anything in the resource tree changes what is shown here. Click the node name and you get tabs like Summary, Shell, Updates, and Storage. Click a VM and you get its own tabs: Summary, Console, Hardware, Options, and so on. These tabs are where every step in this guide takes place.
- Top bar. Contains the Proxmox logo, version number, a search bar, and account buttons. The Create VM button, which you will use shortly, lives in the top-right corner of the interface — it is always visible regardless of what you have selected in the tree.
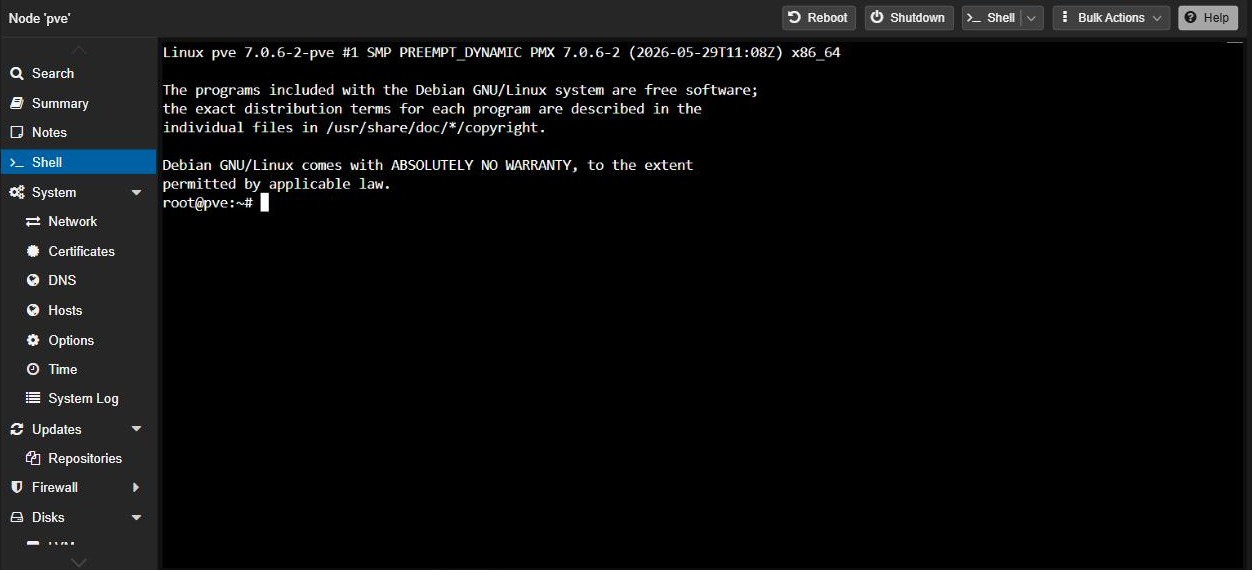
The Shell tab on your node is a browser-based terminal running directly on the Proxmox host. Several steps below use it. You do not need SSH; clicking Shell is enough.
If any of the VM concepts here (LXC vs VM, storage pools, etc.) are unfamiliar, our companion guide Creating Your First VM and LXC Container in Proxmox covers the fundamentals in more depth.
What you need before you start
- A working Proxmox VE installation (version 9.x is current in 2026 — if you are on 8.x, upgrade before continuing)
- At least 2 CPU cores and 4 GB RAM available to allocate to the VM; 4 GB RAM is comfortable with add-ons running
- At least 32 GB of storage on an SSD or NVMe pool — spinning disks will make Home Assistant noticeably sluggish because it writes thousands of small database entries every day
- A network connection from the Proxmox host to the internet so it can download the HAOS image
- (Optional) A Zigbee or Z-Wave USB coordinator dongle plugged into the Proxmox host if you plan to use one
If you are planning to add a Zigbee coordinator, check our Best Zigbee Hub for Home Assistant guide — it covers the difference between a standalone hub and a USB dongle, and explains which makes more sense for a Proxmox setup.
The fast way: the community helper script
If you just want Home Assistant running and are not interested in how the VM is put together, the community-maintained Proxmox VE Helper-Scripts project has a Home Assistant OS VM script that creates and configures the whole VM from a single command in the node Shell. Search the project’s site for “Home Assistant OS”, copy the command from that page, and follow the prompts.
It works well, but it runs a script from the internet as root on your host, so read what it does before you run it. The manual method below takes about fifteen minutes longer and teaches you exactly how the VM is built — which is what you will need the first time something goes wrong.
Step-by-step: installing Home Assistant OS in a Proxmox VM
Step 1 — Open a Shell on your Proxmox node
In the left resource tree, click your node name (usually something like pve). In the content panel on the right, click the Shell tab. A black terminal window opens in your browser. Everything in the next two steps happens here.
Step 2 — Download the HAOS qcow2 image
Home Assistant OS ships as a .qcow2 file — a pre-built virtual disk image used by QEMU, the virtualisation engine underneath Proxmox. You are not installing an operating system onto a blank disk; you are handing a complete, ready-to-run disk to a new VM and booting it. This is a different process from a typical Linux VM install, and it is the step most beginners are surprised by.
Before running the command below, visit the Home Assistant OS releases page on GitHub and note the latest stable version number (the release title, not a beta or release candidate). The version number changes every few months, so always grab the current one rather than copying a number from any guide. Look for a file ending in .qcow2.xz under the Assets section of the latest release.
In the Shell, run:
cd /var/lib/vz/template/iso
wget https://github.com/home-assistant/operating-system/releases/download/VERSION/haos_ova-VERSION.qcow2.xz
Replace both instances of VERSION with the actual version number shown on the releases page. This saves the file into Proxmox’s built-in ISO storage directory, which is a convenient place to keep it. The download is typically a few hundred megabytes — wait for it to complete before moving on.
Once downloaded, decompress it:
unxz /var/lib/vz/template/iso/haos_ova-VERSION.qcow2.xzThis produces a .qcow2 file in the same directory. The .xz file is gone after decompression, which is expected.
Step 3 — Create a new VM
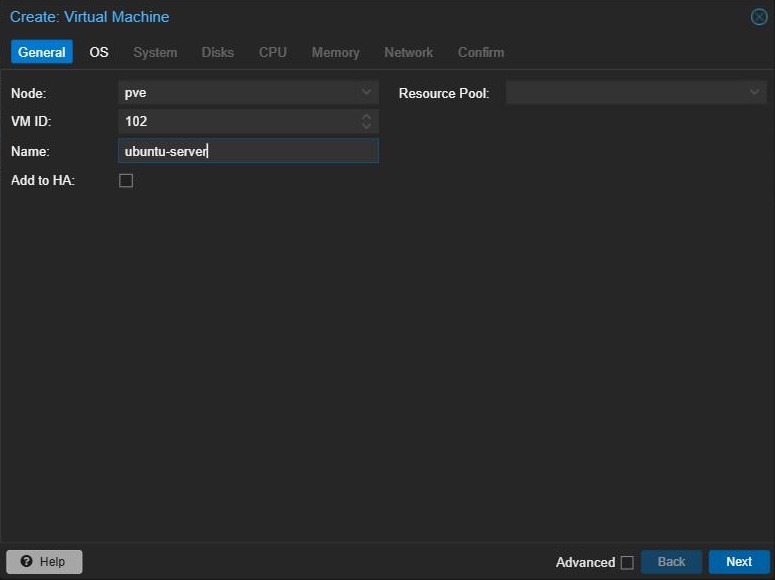
Click the blue Create VM button in the top-right corner of the Proxmox interface. A multi-tab wizard opens. Work through each tab as follows:
General tab
- Give the VM a name —
homeassistantworks well - Note the VM ID that Proxmox auto-assigns (for example
100) — you will need this number in Step 4 - Click Next
OS tab
- Select Do not use any media — you are not booting from an ISO; the disk image is imported separately
- Click Next
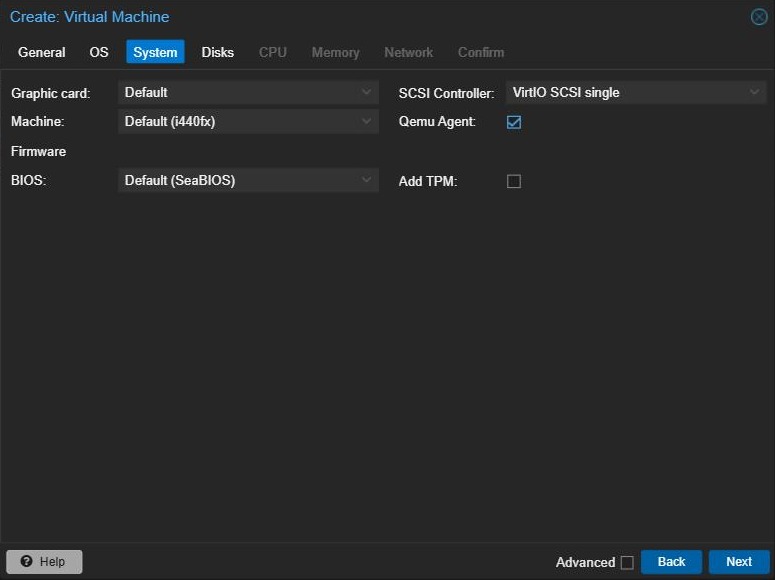
System tab
- Set Machine to
q35— this is the modern chipset required for UEFI boot - Set BIOS to
OVMF (UEFI)— Home Assistant OS specifically requires UEFI and will not boot with the legacy SeaBIOS option that Proxmox defaults to - Tick Add EFI Disk and choose your storage pool (usually
local-lvm) - Untick Pre-Enroll keys. This is ticked by default and it turns on Secure Boot, which Home Assistant OS does not support. If you leave it ticked, the VM will not boot — you will land in a UEFI shell or see an “access denied” boot error instead of Home Assistant. This is the single most common mistake in this install.
- Set SCSI Controller to
VirtIO SCSI single(already the default) - Tick Qemu Agent — Home Assistant OS includes the guest agent, and enabling it lets Proxmox show the VM’s IP address, shut it down cleanly, and take more consistent snapshots
- Click Next
Disks tab
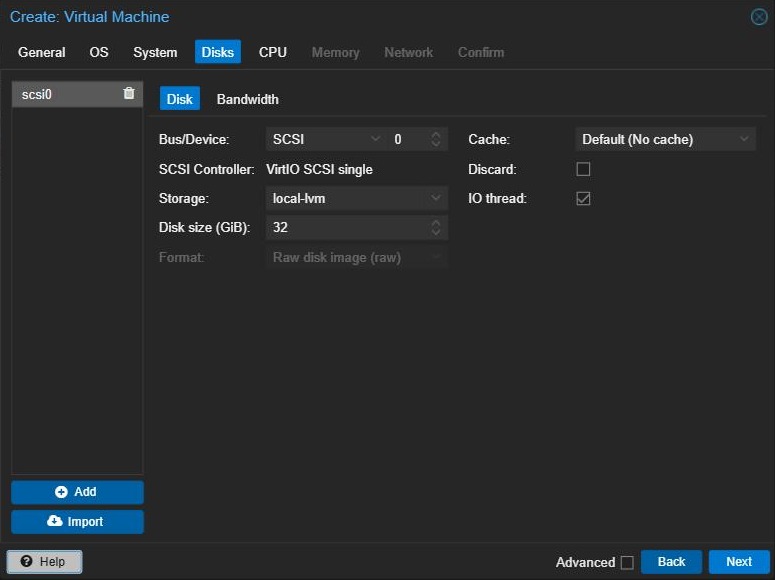
- Delete the default disk Proxmox adds by clicking the trash icon next to it — you will have no disks listed after this, which is correct. The actual disk comes from the imported image in Step 4.
- Click Next
CPU tab
- Set Cores to
2as the minimum; use4if your host has cores to spare - Set Type to
host— this passes through the full CPU feature set, which some Home Assistant add-ons and containers rely on - Click Next
Memory tab
- Set Memory to
4096MB (4 GB). Home Assistant will technically run on 2 GB, but 4 GB is the comfortable practical minimum once you start adding integrations and add-ons. - Click Next
Network tab
- Leave Bridge as
vmbr0(the default bridge Proxmox creates) - Set Model to
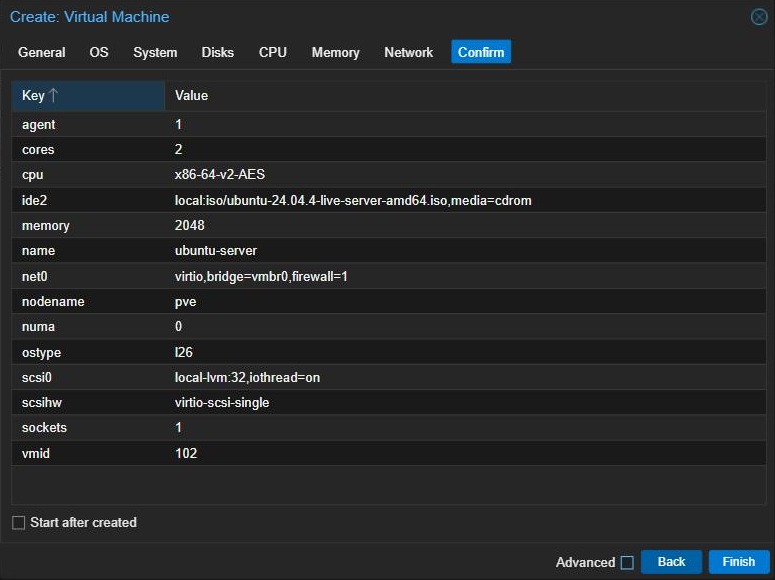
VirtIO (paravirtualized)— this is a paravirtualized driver, meaning less overhead than emulated hardware; Home Assistant OS supports it natively - Click Next, then Finish — but do not tick “Start after created”
Step 4 — Import the HAOS disk image
Your VM exists now but has no actual operating system disk. Go back to the Shell tab on your node and run the import command. Replace 100 with your actual VM ID, VERSION with your version number, and local-lvm with your storage pool name (check the Datacenter → Storage section if you are unsure of the name):
qm disk import 100 /var/lib/vz/template/iso/haos_ova-VERSION.qcow2 local-lvmOlder guides use qm importdisk — that is the previous name for the same command and still works on Proxmox 9. The import may take 30–90 seconds depending on disk speed. When it finishes you will see a success message and the disk will be attached to the VM as an unused disk.
qm disk import for images kept on a storage with the Import content type.Step 5 — Attach the imported disk and set boot order
The disk is imported but not yet connected to the VM. In the resource tree, click your new VM, then click the Hardware tab. You will see an entry called Unused Disk 0. Double-click it.
- Leave the Bus/Device as
SCSIand device number0 - Tick the Discard checkbox — this enables TRIM, which helps SSD longevity
- Click Add
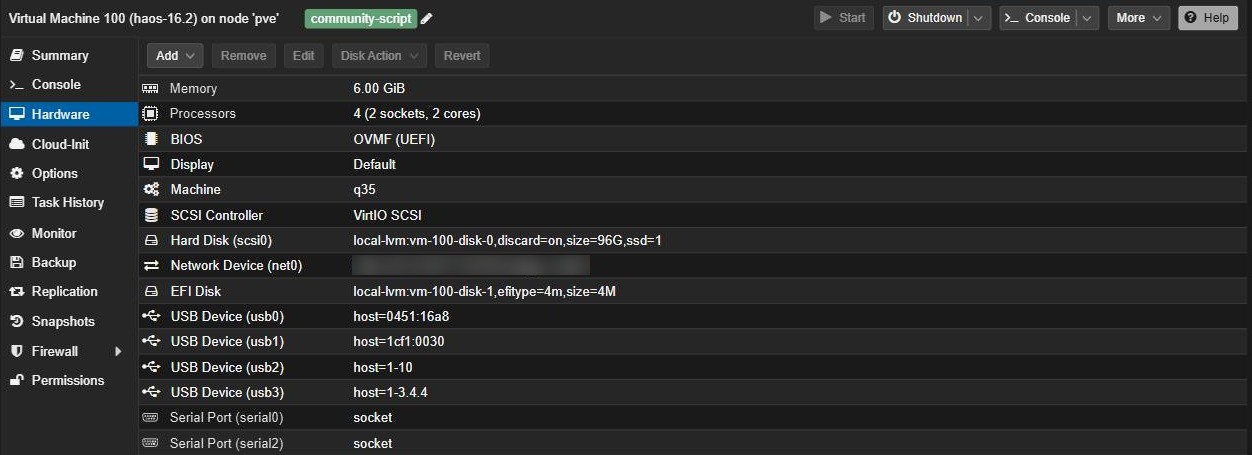
Optional — make the disk bigger. The HAOS image gives you a 32 GB disk. If you plan to run several heavy add-ons or keep a long history database, grow it now: select the new scsi0 disk in the Hardware tab, click Disk Action → Resize, and add the extra space (for example 32 GiB to reach 64 GB). Home Assistant OS expands its filesystem to fill the disk automatically on boot, so there is nothing else to do.
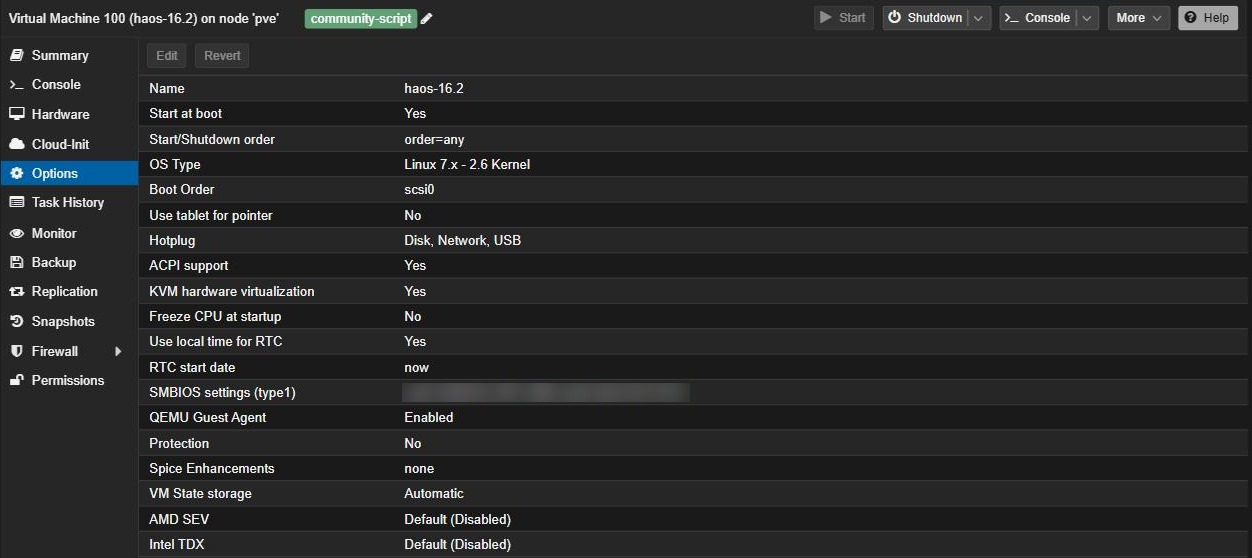
Now click the Options tab for the same VM and open Boot Order. Enable the SCSI disk you just attached (it will appear as scsi0) and move it to the top of the boot order. Disable any other entries. Click OK.
Still on the Options tab, double-click Start at boot and enable it — this makes the VM restart automatically if your Proxmox host reboots after a power cut.
Step 6 — (Optional) Pass through a Zigbee or Z-Wave USB dongle
If you have a USB coordinator plugged into your Proxmox host, add it to the VM now, before first boot. Proxmox does not automatically give VMs access to USB devices — you have to explicitly map each one.
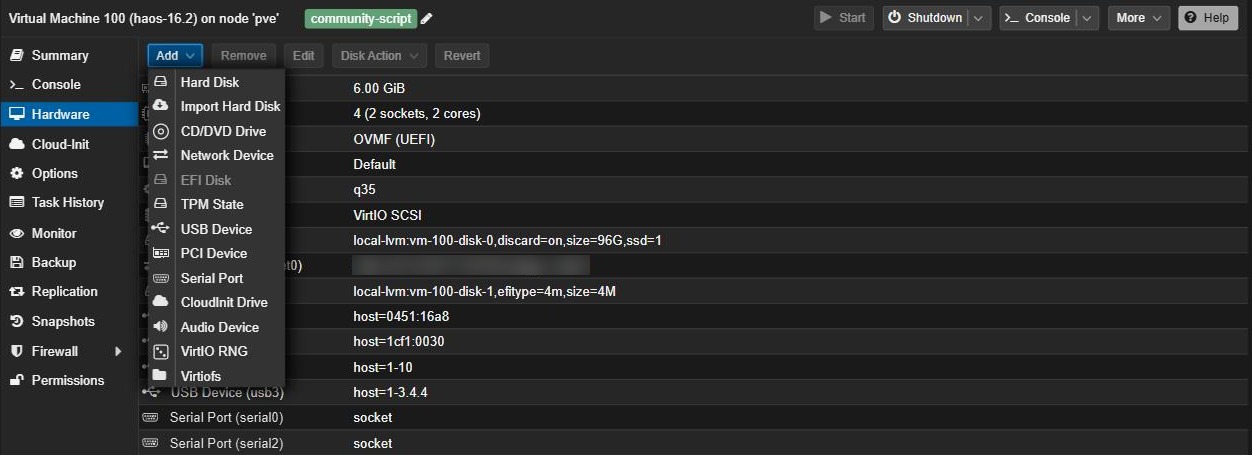
With your VM selected in the tree, go to the Hardware tab, click Add, and choose USB Device. In the dialog, select Use USB Vendor/Device ID and choose your dongle from the dropdown list. Using the Vendor/Device ID method (rather than the port number) means the passthrough survives reboots and remains stable even if you move the dongle to a different USB port on the host.
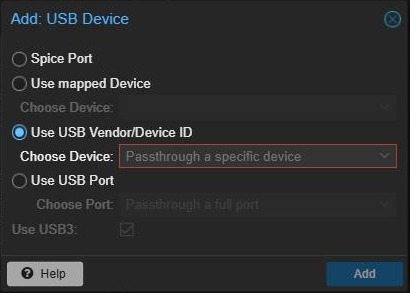
If your dongle does not appear in the dropdown, open the node Shell and run lsusb to confirm Proxmox can see it at the host level.
Inside Home Assistant, once the VM is running, the dongle shows up as something like /dev/ttyUSB0 or /dev/ttyACM0. When ZHA or Zigbee2MQTT asks for the serial port, choose the /dev/serial/by-id/usb-... path instead. The ttyUSB number can change if you add another USB device later; the by-id path never does.
Not sure whether a standalone hub or a USB dongle is the right choice for your setup? Our Zigbee Hub vs Dongle guide walks through the trade-offs in detail.
Popular USB Zigbee coordinators that work well with Home Assistant on Proxmox:
Sonoff Zigbee 3.0 USB Dongle Plus-E (ZBDongle-E) — built on the Silicon Labs EFR32MG21 chip and pre-flashed as a Zigbee coordinator out of the box. It is one of the most widely used coordinators in the Home Assistant community and works with both ZHA and Zigbee2MQTT. Check the model code when buying — the similar-looking ZBDongle-P uses a different chip.
Check price: Amazon UK | Amazon US | Amazon IE
SMLIGHT SLZB-07 Zigbee USB Coordinator — also based on the EFR32MG21 chip, pre-flashed and ready to use with ZHA and Zigbee2MQTT. Its compact form factor is well suited to mini PCs and servers where USB ports are tight. (SMLIGHT also sells the SLZB-07p7, a CC2652P7-based variant — make sure you are buying the one you want.)
Check price: Amazon UK | Amazon US | Amazon IE
Step 7 — Start the VM and watch it boot
With your VM selected in the resource tree, click the Start button at the top of the content panel, then immediately click the Console tab. You will see boot log text scrolling past. The first boot takes longer than subsequent ones — Home Assistant OS resizes its filesystem to fill the virtual disk and initialises the Supervisor, so give it up to two minutes. Do not interrupt this process or restart the VM during it.
When HAOS is ready, the console will display an IP address and a URL in the format http://homeassistant.local:8123 or the raw IP. Note that address.
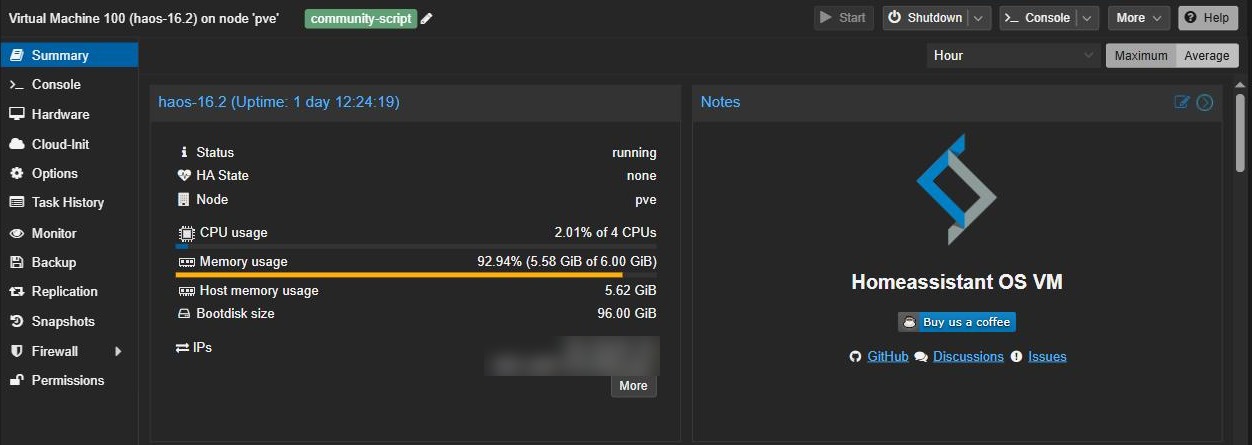
Now click the VM’s Summary tab. If the guest agent is working, the IP address will be listed there too. If Summary says the guest agent is not running, go to Options → QEMU Guest Agent, make sure Enabled is ticked, and do a full shutdown and start of the VM.
Step 8 — Complete Home Assistant onboarding
Open a browser on any device on your network and go to http://<HAOS-IP>:8123. You will land on the Home Assistant welcome screen.
- Click Create my smart home
- Create your admin user account — store the password in a password manager now, not later
- Set your location and time zone (used for sun-based automations)
- Choose whether to share anonymous diagnostics with the Home Assistant team
- Home Assistant will scan your network and list any devices it finds automatically — this is normal even if the list is short or empty
Once you are inside the Home Assistant dashboard, open Settings and install any pending updates shown at the top of the page before doing anything else.
Step 9 — Assign a static IP (do this now, not later)
A home automation hub that changes its IP address after a DHCP lease renewal will break integrations, app connections, and anything you have bookmarked. Fix this before you build anything:
- Preferred method — DHCP reservation on your router: Find the Home Assistant VM’s MAC address (visible in the Proxmox Hardware tab under Network Device) and create a reservation in your router or OPNsense/pfSense for that MAC. Home Assistant needs no changes at all.
- Alternative — static IP inside HAOS: Go to Settings → System → Network in Home Assistant, edit the interface, and set a manual IP address, gateway, and DNS. This works but means the address is managed in two places.
Taking snapshots before every Home Assistant update
Before any Home Assistant update, take a Proxmox snapshot. If the update breaks an integration or an add-on, you can roll the entire VM back in seconds — no config recovery, no reflashing, nothing.
In the Proxmox web UI, select your Home Assistant VM, click the Snapshots tab, then Take Snapshot. Give it a descriptive name like pre-2026-10-update so you can tell them apart. You can also run snapshots from the node Shell using the qm snapshot command. Delete old snapshots once you are happy an update is stable — they consume space on the pool as the VM changes.

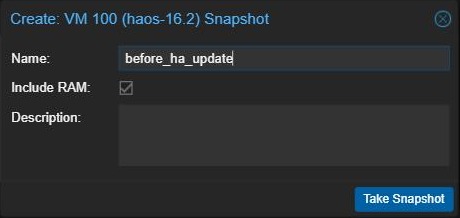
Snapshots depend on your storage type. They work on the default local-lvm (LVM-thin) pool, on ZFS, and on qcow2 disks stored in a directory. If the Take Snapshot button is greyed out, your VM disk is on storage that does not support them (such as plain LVM).
Snapshots are for quick rollbacks, not disaster recovery — they live on the same disk as the VM. For that, schedule automatic backups via Datacenter → Backup: these create full copies of the VM that can be stored on a different drive or a NAS. Combine scheduled Proxmox backups, pre-update snapshots, and Home Assistant’s own built-in backup (which captures your configuration and automations) and you have three independent layers of protection.
What to set up inside Home Assistant next
With the VM running and a static IP locked in, here are the logical next steps:
- Add your first integration — if you have a Zigbee coordinator, go to Settings → Devices & Services → Add Integration and search for either Zigbee Home Automation (ZHA) or install the Zigbee2MQTT add-on
- Install the File Editor or Studio Code Server add-on for editing configuration files directly in the browser
- Enable the SSH & Web Terminal add-on for shell access inside HAOS
- If you are adding smart plugs with energy monitoring to track consumption, our Best Zigbee Smart Plugs with Energy Monitoring guide covers the top options that pair well with this exact setup
Frequently asked questions
My VM boots to a UEFI shell or shows an “access denied” error — what went wrong?
Secure Boot is switched on. This happens when Pre-Enroll keys was left ticked on the EFI disk during VM creation. The quickest fix is to remove the EFI disk in the VM’s Hardware tab and add a new one with Pre-Enroll keys unticked, then start the VM again. Alternatively, press Esc repeatedly as the VM starts to enter the UEFI menu, go to Device Manager → Secure Boot Configuration, untick Attempt Secure Boot, save, and reset.
The console never shows an IP address — what do I check?
Home Assistant OS gets its address from your router by DHCP, so this almost always means it cannot reach one. Check that the VM’s network device is on the same bridge as your Proxmox host’s LAN connection (usually vmbr0), that no VLAN tag is set on the network device unless your network actually uses one, and that your router’s DHCP server is switched on. If you changed any of these, do a full stop and start of the VM.
Can I run Home Assistant in an LXC container instead of a VM on Proxmox?
Technically yes, but the VM approach is strongly recommended for most users. Home Assistant OS as a full VM gives you the complete Supervisor experience — the add-on store, automatic OS updates, and the built-in backup system — all without any extra configuration. Running Home Assistant Supervised inside a Debian LXC is possible but is considered unsupported and fragile by the Home Assistant project. USB dongle passthrough is also significantly simpler with a VM than with an LXC container. Stick with the VM unless you have very constrained hardware.
My Zigbee dongle isn’t showing up inside Home Assistant after passthrough — what do I check?
First confirm the dongle appears in the Proxmox Hardware tab for the VM (it should be listed as a USB device). If it is listed but not detected inside HAOS, do a full stop and start of the VM — not just a reboot — as the initial passthrough sometimes requires a cold boot cycle to register. If the dongle still does not appear, open the node Shell, run lsusb, and verify Proxmox can see the device at the host level before the passthrough can work. Always use the Vendor/Device ID passthrough method rather than port-based passthrough to avoid the device disappearing after a reboot or port change.
How much RAM and storage should I actually give the Home Assistant VM?
Start with 4 GB RAM and 32 GB storage on an SSD or NVMe pool. For storage, 32 GB covers the OS, add-ons, and months of history database; bump to 64 GB if you plan to run several heavy add-ons (see the optional resize in Step 5). Do not use spinning hard drives for the VM disk — Home Assistant writes small database records continuously and will feel sluggish on an HDD.
3 comments on "Installing Home Assistant in a Proxmox VM"
Pingback: How to Back Up and Restore Home Assistant (2026 Guide) - The Homelab Bench
Pingback: How to Set Up an IoT VLAN for Home Assistant - The Homelab Bench
Pingback: How to Install Proxmox: The Next Step After a Raspberry Pi