
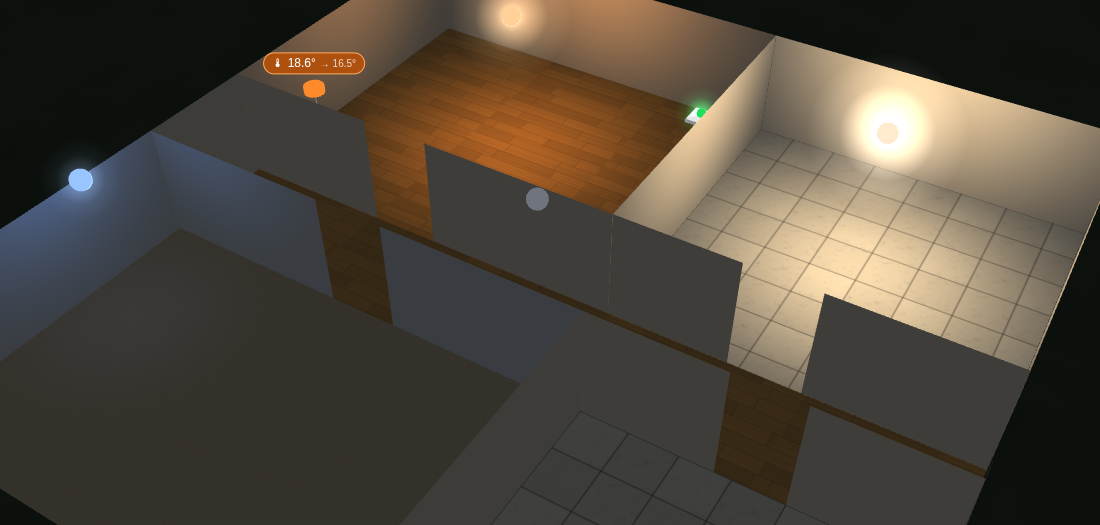
I wanted a dashboard that looked like my actual house: rooms I could spin around, lights that glow in the colour they really are, and sockets and thermostats sitting where they are on the wall. Nothing on HACS did quite that, so I built it. It’s now free and open source as House 3D Card, and you can install it from HACS in a couple of minutes.
What it does
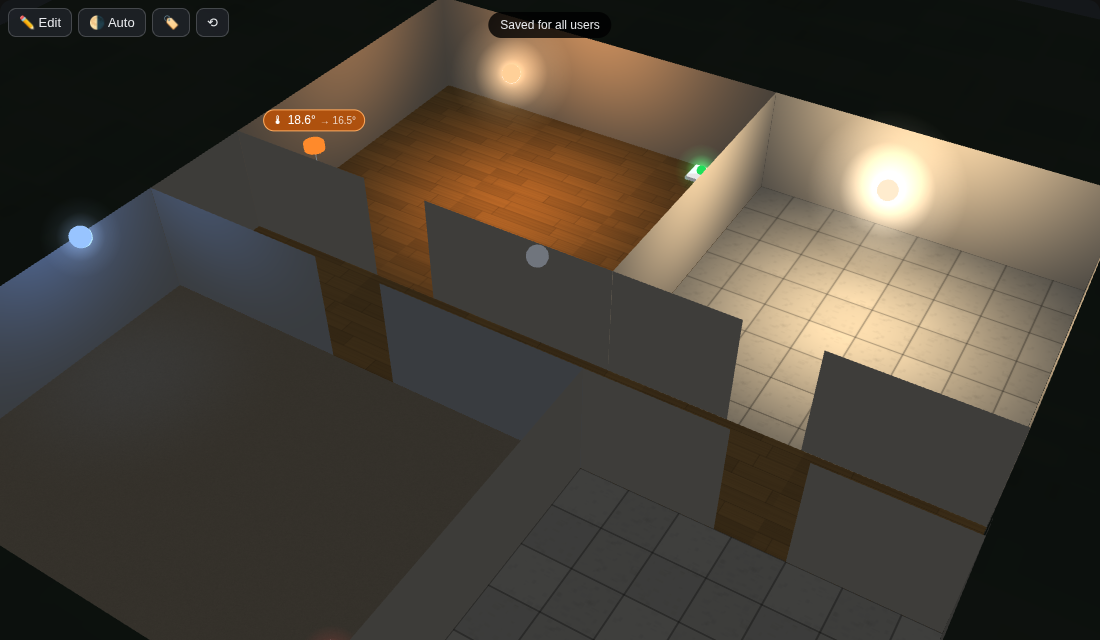
- Rotate, zoom and pan the house by dragging, on desktop or phone (pinch to zoom, two fingers to pan). The walls nearest you hide themselves so you can always see into the rooms.
- Lights glow in their real colour and brightness, and only light up their own room. Dim a bulb and its pool of light shrinks.
- Sockets and switches show as a wall plate with a green (on) or red (off) LED.
- Thermostats show current → target temperature and turn orange while heating. Tap one for a −/+ control and HVAC modes.
- Tap a light or socket to toggle it. Long-press for the normal Home Assistant more-info dialog (dimming, colour, history).
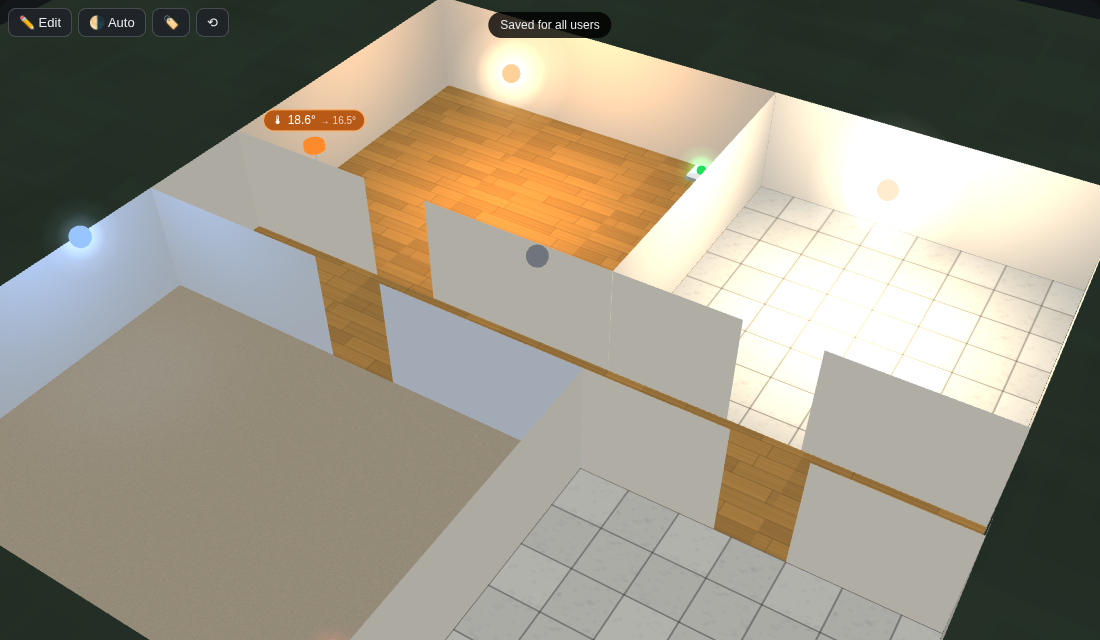
- Day and night: the ambient light follows
sun.sun, or you can force day or night. - Your layout is saved in Home Assistant, so every phone, tablet and PC shows the same house. You can export it as JSON for backup.
- It’s a single file with three.js bundled in, so there’s no CDN and it works on the companion app and offline.
Install it with HACS
- In Home Assistant, open HACS, tap the ⋮ menu (top right) and choose Custom repositories.
- Paste
https://github.com/markrgriffin/lovelace-house-3d-card, set the type to Dashboard, and add it. - Search HACS for House 3D Card and download it. HACS registers the card for you.
- Refresh your browser (Ctrl+Shift+R on a PC) so it picks up the new card.
Not using HACS? Download house-3d-card.js from the latest release, copy it to /config/www/, and add /local/house-3d-card.js as a JavaScript module under Settings → Dashboards → ⋮ → Resources.
Add it to a dashboard
It looks best filling a whole view. Create a new view, set its type to Panel, and add this card in the YAML editor:
type: custom:house-3d-cardUseful options: height (any CSS height), storage_key (use a different key per card, for example one card per floor), ambient (auto, day or night) and allow_edit. The full list is in the README.
Turn the starter house into your house
The card starts with a small five-room example house. Here’s how to replace it with yours:
- Get a plan image. A photo of the architect’s drawing, a screenshot from a floor-planner, or a neat sketch all work. Put it in
/config/www/, for example/config/www/plan.png. - Tap ✏️ Edit → Set plan image, enter
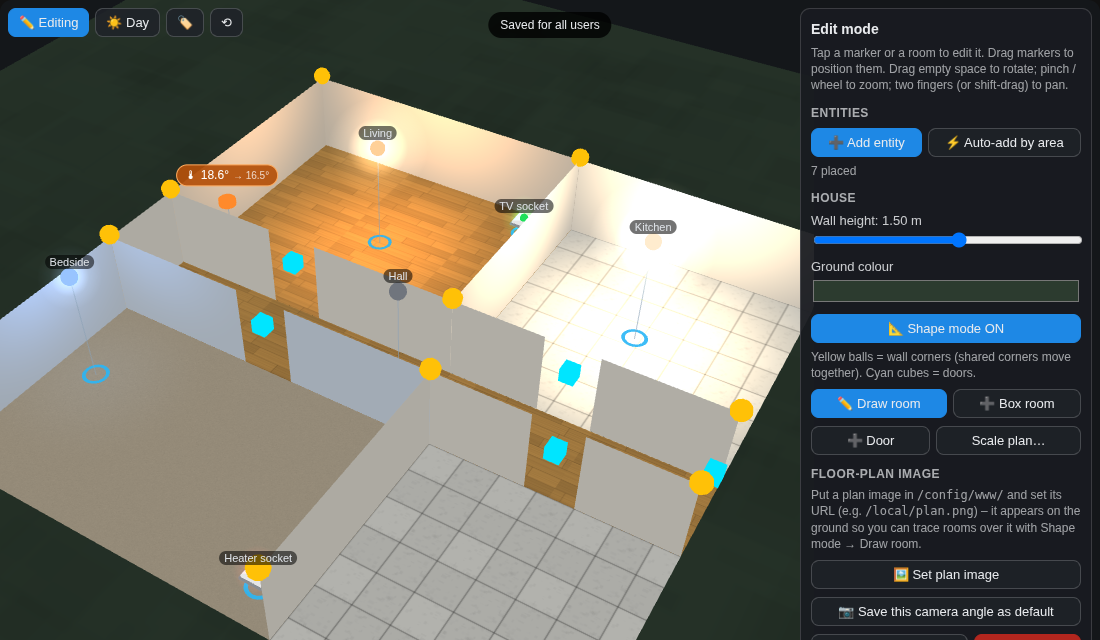
/local/plan.pngand roughly how wide the drawing is in metres. Line it up with the width, offset and rotation sliders. - Go to Shape mode → Draw room and tap each corner of a room in order. Corners snap to existing ones, so shared walls line up. Tap the first corner again to close the room, then repeat for every room and delete the starter rooms you don’t need.
- Add doors, then set each room’s name, Home Assistant areas, floor (wood, carpet or tile) and wall colour.
- Tap ⚡ Auto-add by area. Every light and thermostat lands in the room that matches its Home Assistant area. Drag them to their real spots and add sockets with ➕ Add entity.
- Tap Save.
Tips
- A wall height of around 1.5 m gives the best view into the rooms.
- If you got the metres wrong, Scale plan… rescales the whole house in one go.
- Found an angle you like? Save this camera angle as default remembers it.
- Have two floors? Add two cards with different
storage_keyvalues, one for each floor.
Early release: feedback welcome
This is the first public release. It’s running on my own Home Assistant every day, but every house and setup is different, so if something doesn’t work or you’d like a feature, please open an issue on GitHub. The code is MIT-licensed, so you’re welcome to fork it and improve it too.
Get it here: github.com/markrgriffin/lovelace-house-3d-card